
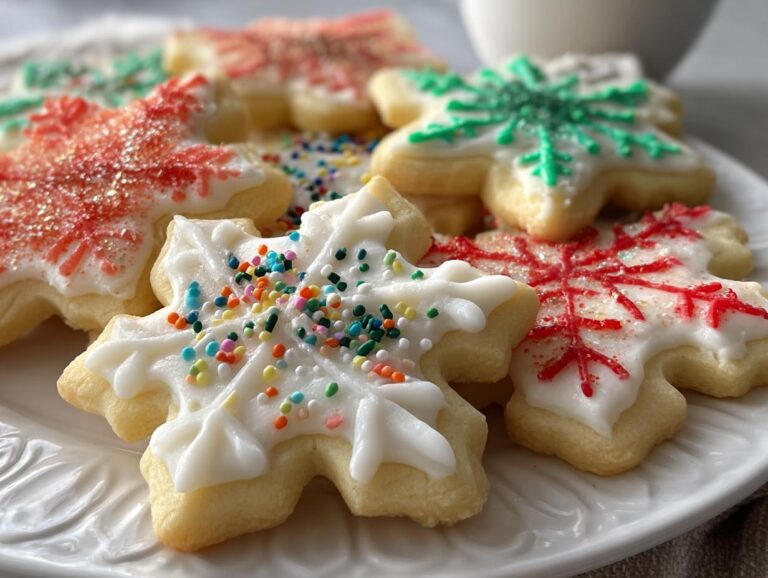
Nothing says Christmas like the smell of freshly baked Soft Christmas Sugar Cookies wafting through the house! These melt-in-your-mouth treasures have been my family’s holiday tradition since I was knee-high to a mixing bowl. That first bite of buttery softness takes me right back to childhood winters spent decorating cookies with my grandma.
The secret? Just enough flour to hold their shape, but plenty of butter to keep them tender. They bake up pillow-soft with barely golden edges – perfect canvases for royal icing and sprinkles. Every December, my kitchen turns into Santa’s workshop as we cut out trees, stars, and snowflakes. These cookies disappear faster than you can say “ho ho ho!”
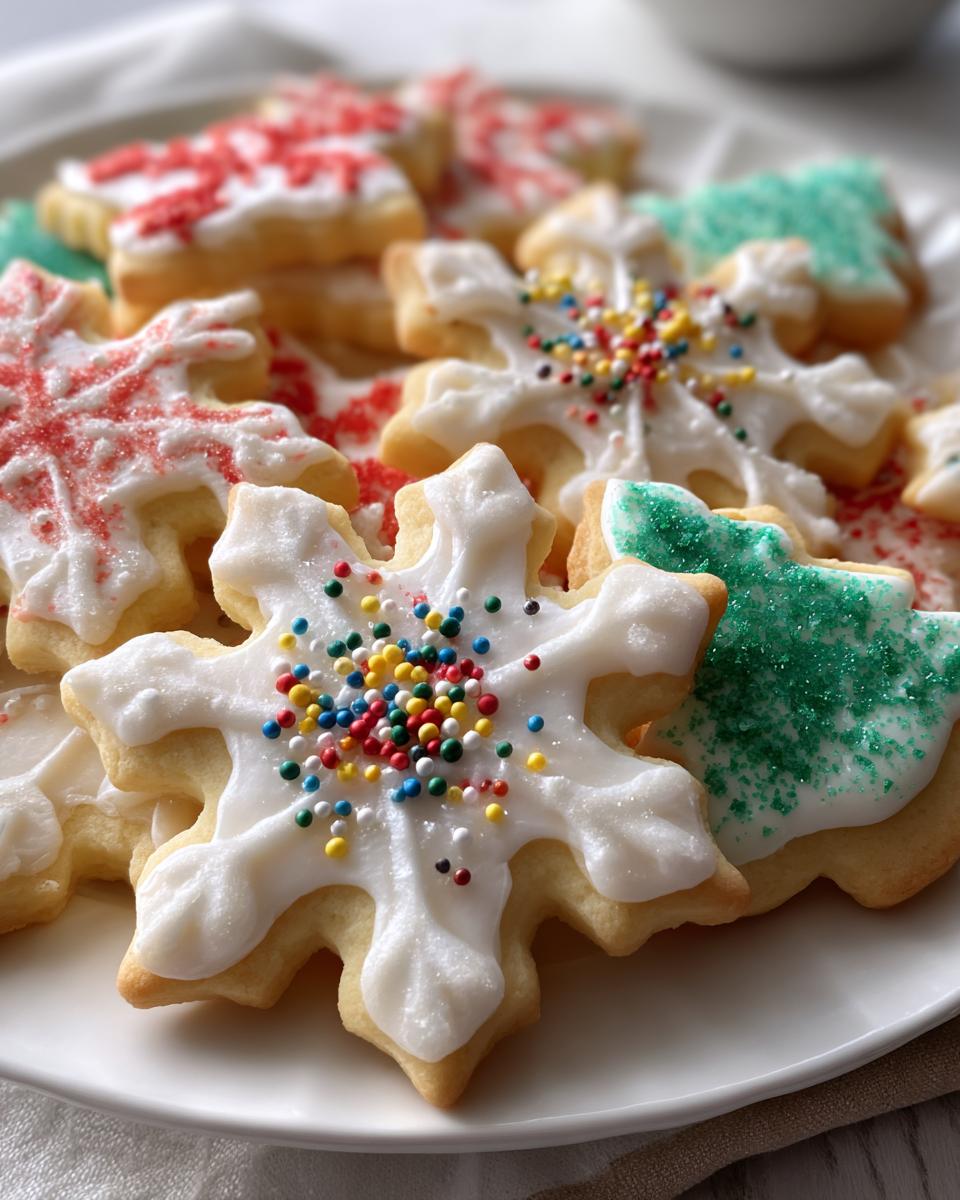
Why You’ll Love These Soft Christmas Sugar Cookies
Oh, where do I even start? These cookies are like little edible hugs—warm, buttery, and impossible to resist. Here’s why they’ll become your new holiday staple:
- Melt-in-your-mouth magic: That first bite? Pure bliss. The perfect balance of flour and butter makes them tender—not crumbly—with edges that stay soft for days (if they last that long!).
- Decorator’s dream: The smooth surface holds icing like a canvas, whether you’re piping intricate snowflakes or letting the kids go wild with sprinkles. Pro tip: A dash of almond extract in the dough adds a subtle flavor that plays so nicely with sweet icing.
- Nostalgia in every bite: These are the classic holiday sugar cookies you grew up with—simple, festive, and just sweet enough. One whiff of vanilla and butter baking, and you’re transported to Christmases past.
- Kid-approved fun: From rolling out the dough to licking icing off fingers, this recipe is practically designed for little helpers. My nieces fight over who gets to press the cookie cutters (and “test” the scraps).
Trust me, these cookies disappear faster than wrapping paper on Christmas morning. And the best part? Even if your decorations look like a glitter bomb went off (mine often do), they’ll still taste incredible.
Ingredients for Soft Christmas Sugar Cookies
Gather these simple ingredients – you probably have most in your pantry already! I’ve learned over the years that quality matters here. That butter better be the real deal, and please, for the love of Christmas, don’t skip the almond extract (trust me on this one). Here’s everything you’ll need:
Dry Ingredients
- 2 3/4 cups all-purpose flour (spoon and level it – don’t pack!)
- 1 teaspoon baking soda
- 1/2 teaspoon baking powder
- Pinch of salt (about 1/8 tsp if you’re measuring)
Wet Ingredients
- 1 cup (2 sticks) unsalted butter, softened (leave it out for 30 minutes – it should dent slightly when pressed)
- 1 1/2 cups granulated sugar
- 1 large egg (room temperature cracks less when mixing)
- 1 teaspoon pure vanilla extract (the good stuff makes a difference)
- 1/2 teaspoon almond extract (optional but SO worth it)
- 3 tablespoons milk (whole milk gives best richness)
For Decorating
- Royal icing or simple glaze (I’ll share my favorite recipes later!)
- Festive sprinkles, colored sugar, nonpareils – go wild!
- Food coloring gels (not liquid – they thin the icing too much)
See? Nothing fancy. Just good, honest ingredients that come together to make cookie magic. Now let me tell you – that combination of vanilla and almond extract? It’s what makes people ask “What’s your secret?” with that dreamy look in their eyes.
How to Make Soft Christmas Sugar Cookies
Alright, let’s get baking! I’ve made these cookies more times than I can count, and I’ve learned a few tricks along the way. Follow these steps, and you’ll have the most tender, buttery Christmas cookies that hold their shape beautifully while staying soft as a snowflake.
Step 1: Cream Butter and Sugar
This is where the magic starts, folks. Grab that softened butter (it should dent when you press it, but not be greasy) and granulated sugar. Using either a stand mixer with the paddle attachment or a good ol’ wooden spoon and elbow grease, beat them together for a solid 3 minutes. You want it light, fluffy, and pale yellow – like sweetened whipped butter. I always set a timer because it makes all the difference in texture! The sugar crystals create tiny air pockets that’ll give your cookies that perfect tender bite.
Step 2: Add Wet Ingredients
Now for the fun part! Crack in that room-temperature egg (cold eggs can make the batter separate – been there, done that) and pour in the vanilla and almond extracts. The almond is optional, but it gives that “what is that amazing flavor?” mystery. Mix just until combined – about 30 seconds. Then drizzle in the milk slowly while mixing on low. Here’s my big warning: DON’T overmix at this stage! We’re going for incorporated, not whipped. Overworking the wet ingredients can lead to tough cookies, and we want clouds, not hockey pucks.
Step 3: Combine Dry Ingredients
Time to marry the wet and dry teams! Whisk together your flour, baking soda, baking powder, and that pinch of salt in a separate bowl. I like to sift mine to prevent lumps, but a good whisking works too. Now, add the dry ingredients to the butter mixture in 3 additions, mixing on low speed just until the flour disappears after each one. The dough should come together in a soft, slightly sticky mass that holds its shape when pinched. If it seems too sticky? Don’t panic! That’s why we chill it.
Step 4: Roll and Cut the Dough
Here’s where the Christmas magic happens! Lightly flour your surface (I use a clean countertop covered with parchment paper) and rolling pin. Scoop out half the dough (keep the rest chilled) and roll to 1/4″ thickness – any thinner and they’ll crisp up too much, any thicker and they won’t bake evenly. Dip your cookie cutters in flour between cuts to prevent sticking. Pro tip: If the dough gets too soft while you’re working, pop it in the fridge for 10 minutes. I can’t tell you how many times I’ve saved doomed dough this way!
Step 5: Bake and Cool
Preheat that oven to 350°F (175°C) and line your baking sheets with parchment paper – no sticking and easy cleanup! Arrange cookies about 2 inches apart (they spread just a tad). Bake for 8-10 minutes – you want the edges JUST starting to get the faintest golden hue while the centers still look soft. They’ll firm up as they cool. Let them sit on the baking sheet for 2 minutes before transferring to a wire rack. This is crucial – moving them too soon can cause breakage, and waiting too long makes them stick. Resist decorating until completely cool, unless you want icing that slides right off!
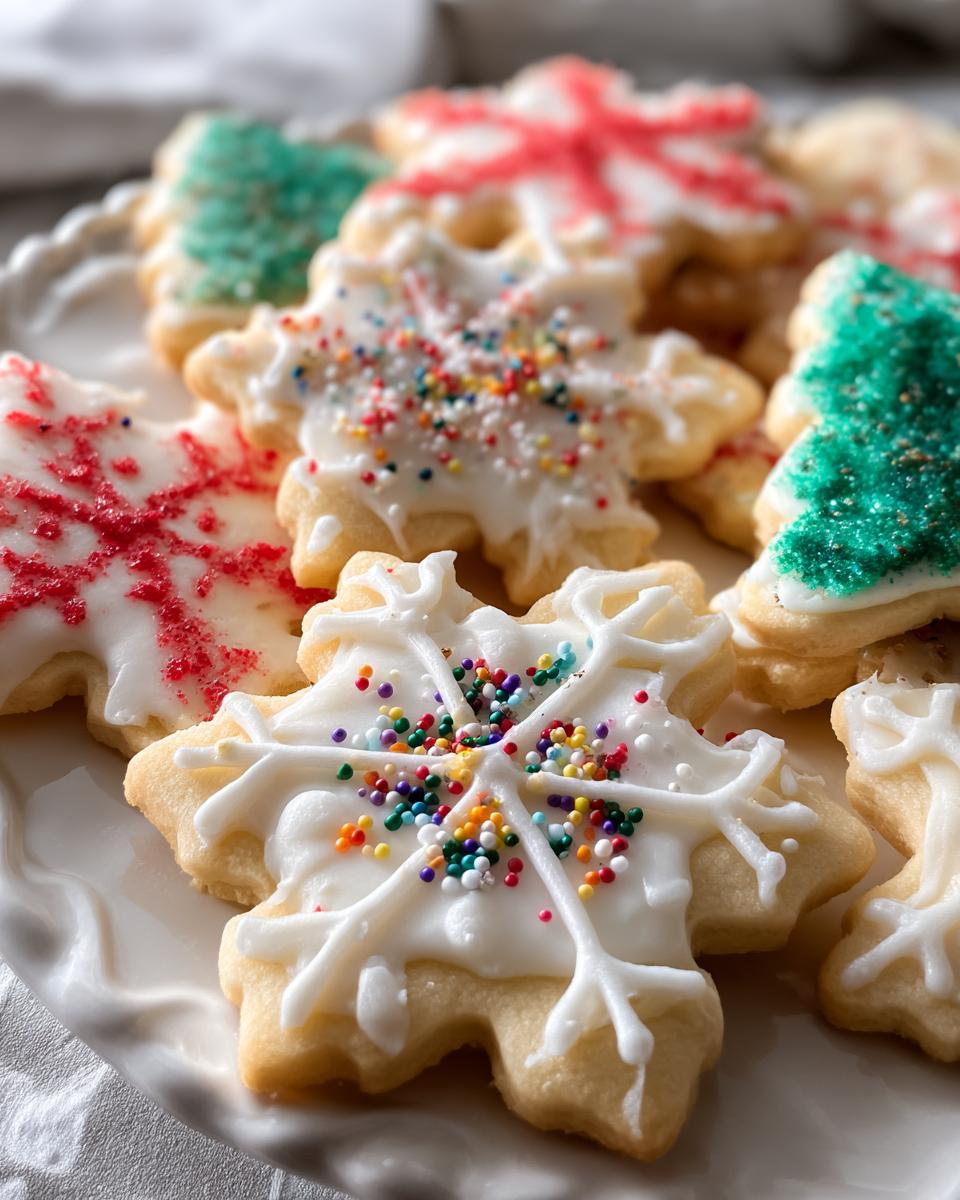
Decorating Your Soft Christmas Sugar Cookies
Now for the best part – turning these blank cookie canvases into edible Christmas masterpieces! I’ve decorated hundreds (maybe thousands?) of these cookies over the years, and I’ve learned a few tricks to make them look bakery-worthy, even if you’re all thumbs with a piping bag.
Choosing Your Icing
You’ve got options here, my friend. Royal icing dries hard and shiny – perfect for detailed piping work. My simple glaze (just powdered sugar + milk + vanilla) stays slightly soft but sets enough for stacking. Whichever you choose, tint small batches with gel food coloring – liquid colors will make your icing too runny. Pro tip: Add coloring gradually! That red can go from “cheery Santa” to “crime scene” real quick.
The Decorating Process
First rule: COMPLETELY cooled cookies. I know it’s tempting, but warm cookies make icing melt right off. For royal icing, I use the “flood and pipe” method:
- Outline your design with thicker icing (add less liquid)
- Thin the remaining icing slightly with milk or water
- “Flood” the inside with a squeeze bottle or spoon
- Use a toothpick to guide the icing into corners
For glaze? Just dunk the cookie tops and let excess drip off. Either way, add sprinkles IMMEDIATELY after applying icing – they won’t stick once it starts setting.
Themed Design Ideas
Get creative with your cookie cutters! Here are some of my favorite combos:
- Christmas Trees: Green icing with colorful “ornament” dots and a yellow star on top
- Snowflakes: White icing with edible silver pearls at the points
- Stockings: Red and white stripes with a “fur” cuff made from white sprinkles
- Gingerbread People: Outline “stitching” with piping icing and give them little bowties
Let your cookies dry completely before stacking – usually 4-6 hours for royal icing, 1-2 hours for glaze. Store between layers of parchment paper so your beautiful designs don’t stick together. And don’t stress about perfection – some of my most memorable cookies have been the “abstract” ones my nephew decorated!
Tips for Perfect Soft Christmas Sugar Cookies
After years of trial and error (and a few cookie disasters I’d rather forget), I’ve nailed down the secrets to consistently perfect soft sugar cookies. These little tricks make all the difference between “good” and “OH MY SANTA THESE ARE AMAZING”:
Chill that dough, seriously
I know, I know – waiting is the hardest part when cookie cravings hit. But trust me, 30 minutes in the fridge makes the dough so much easier to handle. It prevents spreading in the oven, keeps your cookie shapes sharp, and makes rolling a breeze. My grandma taught me to wrap it tight in plastic wrap – the dough keeps better and absorbs less fridge smells. Forgot to chill? No worries! Pop the cut-out cookies on the baking sheet in the freezer for 10 minutes before baking. Works like a charm.
Bake just until the edges blush
This was my biggest learning curve – soft cookies don’t look “done” when they come out of the oven. Pull them when the edges get the faintest golden tint (about 8 minutes in my oven) while the centers still look slightly underbaked. They’ll firm up perfectly as they cool. Overbaking by even a minute turns them from pillowy to crispy. I set a timer and do the “finger test” – gently press the edge; it should spring back slightly but leave a faint indentation.
Parchment paper is your best friend
Skip the greased pans – they make cookies spread too much. Parchment paper gives you perfect release every time and makes cleanup a snap. I buy the pre-cut sheets by the box during holiday season (no more wrestling with curling edges!). Bonus: You can slide the whole parchment with cookies onto the cooling rack, then reuse the same sheet for multiple batches. My baking sheets stay pristine, and I don’t waste a single cookie to sticking disasters.
Sift that powdered sugar for silky icing
Lumpy icing ruins all your decorating efforts. Whether you’re making royal icing or simple glaze, always sift the powdered sugar first. I use a fine mesh strainer – it catches all those annoying little clumps. For extra smooth icing, let it rest for 5 minutes after mixing to let bubbles rise to the surface, then give it one quick stir before using. Your lines will be cleaner, your flood icing will lay flat, and you won’t get those frustrating sugar lumps clogging your piping tips!
One last bonus tip from my kitchen to yours: Always bake a test cookie first! Ovens vary, and it’s better to sacrifice one cookie to perfect timing than a whole batch. Now go forth and bake with confidence – your softest, most beautiful Christmas cookies await!
Storing and Freezing Instructions
Let’s talk about keeping these precious Christmas treasures fresh – because honestly, you’ll want to savor every last crumb! I’ve learned through years of holiday baking (and some sad, stale cookie casualties) exactly how to make these soft sugar cookies last.
Room Temperature Storage
Decorated cookies in airtight containers are my go-to for short-term storage. Layer them between sheets of parchment paper – this keeps the icing from sticking or smearing. They’ll stay perfectly soft for up to 5 days this way. My favorite trick? Tossing a slice of bread in the container – the cookies absorb just enough moisture from it to stay fresh without getting soggy. Just replace the bread every couple days!
Freezing Undecorated Cookies
This is my Christmas miracle worker! You can freeze the baked (but undecorated) cookies for up to 3 months. Let them cool completely, then stack in freezer-safe containers with parchment between layers. When the cookie craving hits, thaw at room temperature for about an hour before decorating. The texture stays perfect – just like fresh baked!
Freezing Decorated Cookies
Royal icing-decorated cookies freeze beautifully too! Just make sure the icing is completely dry (I wait 24 hours to be safe). Freeze in single layers first on baking sheets, then transfer to containers once solid. They’ll keep for 2 months. Thaw uncovered at room temperature to prevent condensation from ruining your designs. Glaze-decorated cookies don’t freeze as well – the icing tends to get sticky when thawed.
Freezing the Dough
Future-you will thank present-you for this! Roll out the dough between parchment sheets, freeze flat, then stack the frozen sheets in a ziplock bag. When ready to bake, just cut shapes from the frozen dough (no thawing needed!) and add 1-2 extra minutes to the bake time. Alternatively, form the dough into a log wrapped in plastic – perfect for slice-and-bake cookies when you need a quick batch!
Pro tip: Label everything with dates! Nothing’s sadder than finding mystery frozen cookies in July (though…they’d probably still be delicious).
Soft Christmas Sugar Cookies FAQ
Over the years, I’ve gotten so many questions about these melt-in-your-mouth Christmas cookies – let me share the answers to the most common ones! These are the exact tips I give friends when they call me in a cookie panic (yes, that happens more than you’d think).
Can I freeze the dough for later?
Absolutely! In fact, I always make extra dough to freeze. Just wrap it tightly in plastic wrap (I do two layers to prevent freezer burn) and pop it in a freezer bag. It’ll keep for 3 months. When you’re ready to bake, thaw it in the fridge overnight, then let it sit at room temp for 20 minutes before rolling. Pro tip: Roll it out between parchment sheets before freezing – then you can cut shapes straight from frozen!
Why do my cookies spread too much?
Oh honey, we’ve all been there! The usual culprits are: dough that’s too warm (chill it!), too much butter (measure carefully), or over-creaming the butter and sugar (stop when it’s fluffy, not greasy). Also – never skip the baking powder/soda! They help the cookies rise instead of spreading. My foolproof trick? Chill the cut-out cookies on the baking sheet for 10 minutes before they go in the oven.
Can I make these without almond extract?
Of course! The vanilla alone will still give you delicious classic holiday sugar cookies. But if you want that “what makes these so special?” flavor without almond, try substituting 1/4 tsp of lemon extract or orange blossom water. It gives a similar floral note that pairs beautifully with the buttery dough.
How do I get clean cookie cutter shapes?
Here’s my battle-tested method: Flour your cutter between each cut, press straight down without twisting, and if the dough sticks, dip the cutter in flour again. If you’re still struggling, try chilling the dough longer – it firms up and cuts cleaner. And don’t worry about imperfect edges – that’s what icing is for!
Can I use this dough for cookie cups or tart shells?
Yes, but with a little adjustment! Press the dough into mini muffin tins and bake at 325°F for about 12 minutes (watch closely). Immediately after baking, use the back of a spoon to reshape the centers. They make adorable edible cups for mousse or ice cream – perfect for Christmas parties!
Remember – even “mistakes” usually taste amazing. My first batch ever spread into one giant cookie blob…we just broke it into pieces and called it “rustic.” The kids still ate every crumb!
Nutritional Information
Okay, let’s be real – we’re not eating Christmas cookies for their health benefits! But since folks ask, here’s the scoop on what’s in these buttery delights. Keep in mind these are estimates – actual numbers can vary based on your specific ingredients and how generous you are with those sprinkles!
For one undecorated cookie (about 2.5″ diameter):
- Calories: ~140 kcal
- Sugar: 10g (those holiday smiles don’t come sugar-free!)
- Fat: 6g (butter makes everything better, right?)
- Carbs: 20g
- Protein: 1g
Now, once you add icing and decorations? That’s where things get…creative. Royal icing adds about 15-20 calories per cookie, while a simple glaze might add 10. Those festive sprinkles? Maybe 5-10 more. But honestly, when you’re nibbling Santa’s hat off a reindeer cookie, who’s counting?
My philosophy? Enjoy every magical bite – Christmas comes but once a year! (Though I may or may not keep a secret stash in the freezer for January…)
Show Us Your Holiday Cookie Magic!
Now it’s your turn to spread some Christmas cheer! I’d absolutely love to see your beautiful cookie creations. Snap a photo of your decorated masterpieces and tag me on Pinterest @ChristmasCookieQueen – nothing makes me happier than seeing your holiday baking adventures!
Did you try a fun new decoration technique? Discover a genius shortcut? Maybe your little ones created some “abstract art” cookies? (We’ve all been there!) Share your stories and photos so we can celebrate together. I feature my favorite reader creations every December – yours might just make the cut!
Use the hashtag #SoftChristmasCookieMagic so we can all admire your work. And if you run into any cookie conundrums, just ask – I’m always here to help troubleshoot your baking dilemmas. Happy decorating, my holiday bakers!
Print40 Soft Christmas Sugar Cookies That Melt in Your Mouth

Buttery, soft sugar cookies perfect for Christmas, with a melt-in-your-mouth texture and festive decorations.
- Prep Time: 20 minutes
- Cook Time: 10 minutes
- Total Time: 1 hour
- Yield: 24 cookies 1x
- Category: Dessert
- Method: Baking
- Cuisine: American
- Diet: Vegetarian
Ingredients
- 2 3/4 cups all-purpose flour
- 1 tsp baking soda
- 1/2 tsp baking powder
- 1 cup unsalted butter, softened
- 1 1/2 cups granulated sugar
- 1 large egg
- 1 tsp vanilla extract
- 1/2 tsp almond extract (optional)
- 3 tbsp milk
- Holiday royal icing or glaze
- Sprinkles, sanding sugar, and food coloring
- Cookie cutters (trees, snowflakes, snowmen)
Instructions
- Mix butter and sugar until fluffy. Add egg, vanilla, and almond extract. Stir in dry ingredients.
- Roll dough on a floured surface to 1/4” thickness. Cut with festive cookie cutters.
- Bake at 350°F (175°C) for 8–10 minutes until edges are soft, not browned.
- Let cookies cool fully before decorating with icing, sprinkles, and colored sugar.
- Allow icing to set, then store in an airtight container.
Notes
- Dough can be chilled for easier handling.
- Almond extract adds extra flavor but is optional.
- Decorating is fun for kids and adds holiday charm.
Nutrition
- Serving Size: 1 cookie
- Calories: 140
- Sugar: 10g
- Sodium: 50mg
- Fat: 6g
- Saturated Fat: 3.5g
- Unsaturated Fat: 2g
- Trans Fat: 0g
- Carbohydrates: 20g
- Fiber: 0.5g
- Protein: 1g
- Cholesterol: 20mg