
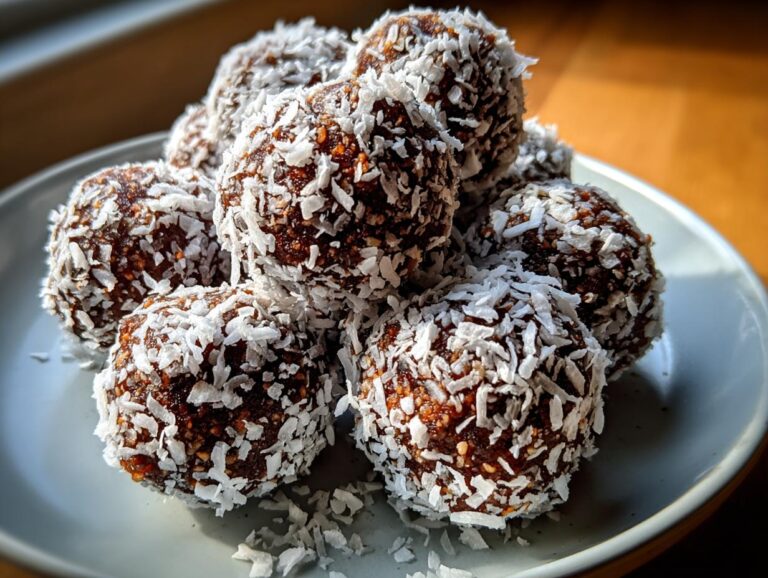
I’ll never forget the first time my Nan handed me a plate of her famous Newfoundland Snowballs – those perfect little no-bake chocolate coconut balls that taste like Christmas in every bite. Growing up in a Canadian household, these were our go-to holiday treat, and now they’re my secret weapon for last-minute cookie swaps! What I love most is how ridiculously simple they are – just oats, cocoa, and coconut transformed into fudgy perfection with a quick syrup and some patience while they chill.
There’s something magical about that moment when the warm chocolate syrup hits the dry ingredients and everything comes together in this sticky, sweet mess that will make you want to eat it with a spoon (not that I’ve done that…okay, maybe once). The best part? These nostalgic snowballs require zero baking – just mix, roll, and let the fridge do the work while you sip your cocoa. Trust me, one bite of these traditional treats and you’ll understand why they’ve been a Canadian holiday staple for generations.
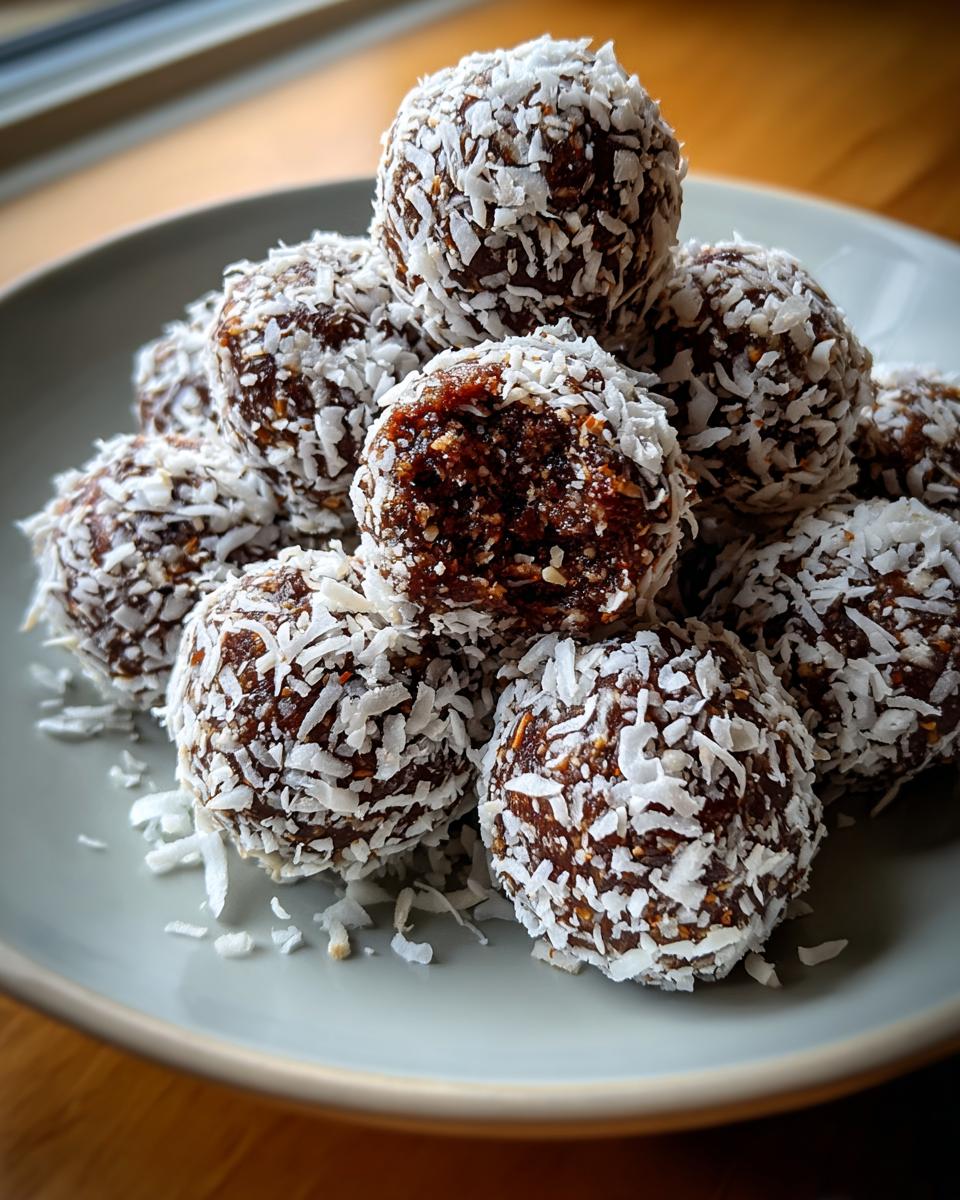
Why You’ll Love This Newfoundland Snowballs Recipe
Let me tell you why these little snowballs stole my heart (and probably will steal yours too):
- No-bake magic: No oven required means you can whip these up even when your kitchen’s overflowing with holiday baking
- Quick prep: From mixing bowl to fridge in under 20 minutes – perfect for those “oh no, I forgot to make something!” moments
- Nostalgia in every bite: That cocoa-coconut combo tastes exactly like my childhood Christmases in Newfoundland
- Crowd-pleaser: I’ve never brought these to a gathering without someone asking for the recipe
- Kid-approved: Little hands love helping roll these into perfect snowballs
- Endlessly customizable: Add nuts, swap dark cocoa, or drizzle with chocolate – they’re your canvas!
Honestly? They’re happiness rolled in coconut.
Ingredients for Newfoundland Snowballs
Here’s everything you’ll need to make these irresistible snowballs – and trust me, you’ll want to measure carefully for that perfect fudgy texture Nan always nailed:
- 2 cups rolled oats (the old-fashioned kind, not quick oats – they give the best chew)
- 1 cup unsweetened shredded coconut plus extra for rolling (that extra coconut coating is non-negotiable!)
- 1/2 cup unsweetened cocoa powder (this is where the deep chocolate flavor comes from)
- 1 1/2 cups white sugar (yes, it seems like a lot, but this syrup is what binds everything together)
- 1/2 cup butter (real butter only – Nan would haunt me if I suggested margarine)
- 1/2 cup milk (whole milk makes them extra rich, but any kind works)
- 1 tsp vanilla extract (the secret flavor booster – don’t skip it!)
See? Simple pantry staples that magically transform into holiday deliciousness. Just wait until you smell that chocolate syrup bubbling on the stove – pure nostalgia!
How to Make Newfoundland Snowballs
Okay, let’s get to the fun part! Making these snowballs is seriously easy, but there are a few tricks I’ve learned over the years that’ll guarantee perfect results every time. Just follow these steps and you’ll be snacking on chocolatey coconut goodness before you know it!
Mixing the Dry Ingredients
First things first – grab your biggest mixing bowl (trust me, you’ll need the space). Dump in those 2 cups of rolled oats, 1 cup of unsweetened shredded coconut, and ½ cup cocoa powder. Now, here’s my secret: whisk them together like your life depends on it! You want every single oat flake coated in that cocoa goodness. I usually mix for a good minute – it makes all the difference in getting that even chocolate flavor throughout every snowball.
Preparing the Syrup
This is where the magic happens! In a medium saucepan, combine 1 ½ cups sugar, ½ cup butter, and ½ cup milk. Turn the heat to medium and – this is crucial – STIR CONSTANTLY. That sugar wants to burn the moment you look away. Once it comes to a gentle boil, set a timer for 3-4 minutes (I do the full 4 for perfect texture). The syrup should coat the back of your spoon when it’s ready. Remove from heat and stir in that 1 tsp vanilla extract – the aroma alone will make your kitchen smell like Christmas!
Rolling and Coating the Snowballs
Now pour that heavenly syrup over your dry ingredients and mix until everything is beautifully coated. Warning: resistance is futile – you’ll want to eat this straight from the bowl. But wait! Let it cool for 10-15 minutes first (burned fingers are no fun). Then, with slightly damp hands (my Nan’s trick to prevent sticking), roll tablespoon-sized portions into balls. Roll each one in that extra coconut you set aside – really press it in so it sticks. Pop them on a parchment-lined tray and chill for at least an hour. The wait is torture, but oh-so-worth it!
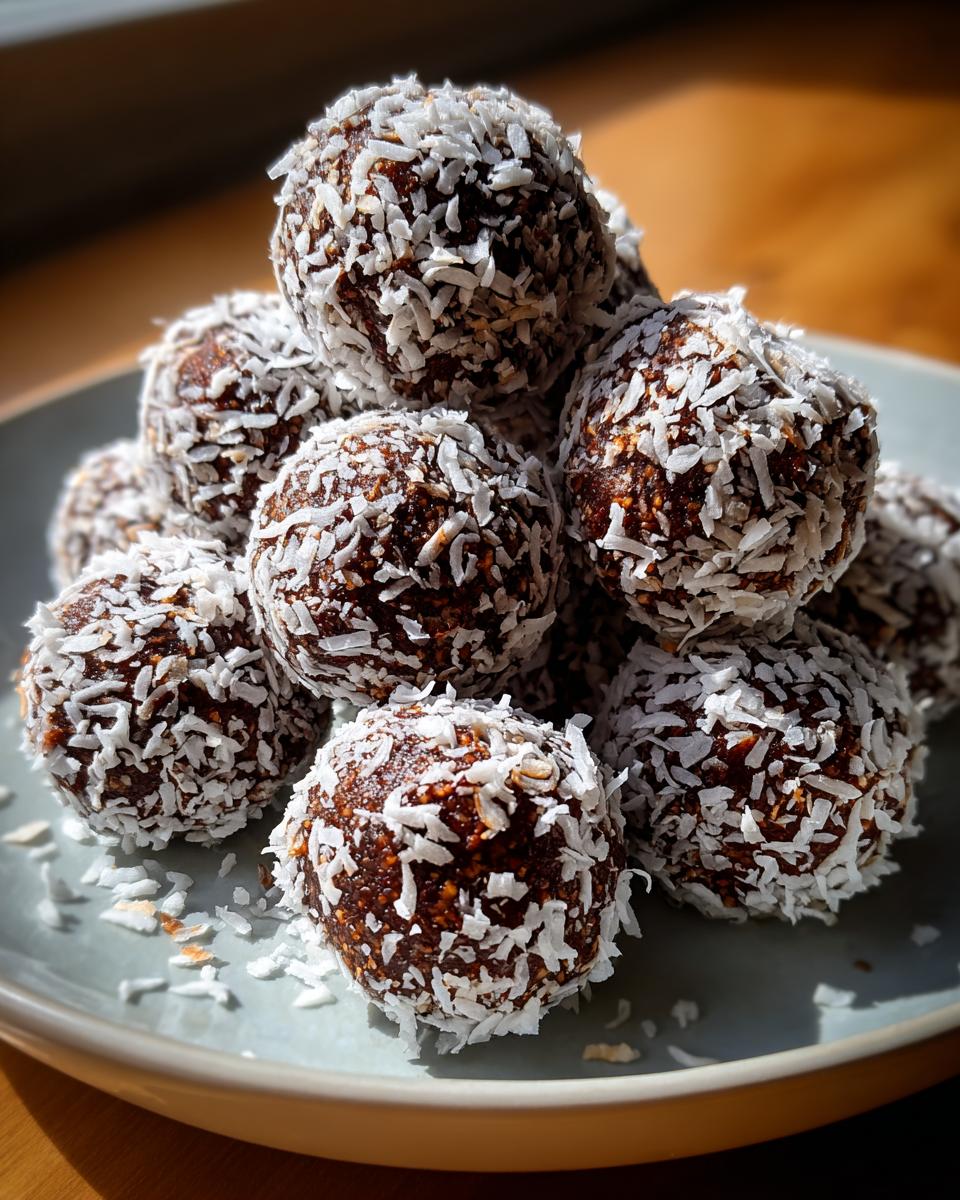
Pro tip: If the mixture gets too firm to roll, just warm it slightly with your hands. And if it’s too sticky? A tiny bit more oats or coconut will save the day. See? Even “mistakes” are fixable with this forgiving recipe!
Tips for Perfect Newfoundland Snowballs
After making these snowballs more times than I can count, here are my foolproof tricks for perfection:
- Patience pays off: Let that mixture cool for a good 15 minutes before rolling – you’ll avoid burnt fingers and the perfect texture forms as it cools
- Parchment is your friend: Line your tray before rolling – no sticking and easy cleanup (Nan used wax paper, but parchment works even better)
- Damp hands solve everything: A quick rinse keeps the mixture from sticking to your palms as you roll
- Seal them tight: Store in an airtight container between layers of parchment – they’ll stay fresh for a week (if they last that long!)
Follow these and you’ll have snowballs that would make my Nan proud!
Variations for Newfoundland Snowballs
Now here’s where we get creative! While my Nan’s original recipe is perfect as-is, I’ve played around with some delicious twists over the years that might just become your new favorites:
- Nutty delight: Fold in ½ cup finely chopped walnuts or pecans with the dry ingredients – that crunch takes these to another level!
- Dark chocolate dreams: Swap regular cocoa powder for dark cocoa (just reduce to ⅓ cup since it’s more intense) for a richer, almost grown-up version
- Chocolate drizzle magic: Melt some semi-sweet chocolate chips with a teaspoon of coconut oil and zigzag it over the chilled snowballs – looks fancy with zero effort
- Peanut butter twist: Replace 2 tablespoons of butter with creamy peanut butter in the syrup – tastes like a candy bar in snowball form
- Festive sprinkle: Roll the finished snowballs in crushed candy canes or colored sugar for holiday parties – the kids go wild for these!
My personal favorite? Adding a pinch of instant espresso powder to the dry ingredients – it deepens the chocolate flavor without tasting like coffee. But shhh…don’t tell Nan I messed with her recipe!
Serving and Storing Newfoundland Snowballs
Nothing beats pulling a tray of these snowballs out of the fridge when friends drop by unexpectedly during the holidays! For an extra festive touch, I love dusting them with powdered sugar right before serving – it looks like they’ve been kissed by real snow. Arrange them on Nan’s vintage cake stand (or any pretty plate, really) with some holly sprigs, and suddenly you’ve got a picture-perfect holiday treat that looks way fancier than the 20 minutes of work it actually took.
Now, here’s how to keep them tasting fresh: Store your snowballs in an airtight container with parchment paper between layers. They’ll stay perfect in the fridge for up to a week – if they last that long! The coconut coating actually helps lock in moisture, so they won’t dry out. I’ve been known to sneak one (or three) straight from the fridge at midnight – something about that chilled, fudgy texture just hits differently.
Pro tip: If you’re making these for a cookie swap or gift boxes, pack them in mini cupcake liners. Not only does it make them look adorable, but it keeps the coconut from making a mess in transit. I once shipped these to my cousin in Alberta, and they arrived perfect – just make sure to include storage instructions so no one leaves them out on the counter!
Nutritional Information for Newfoundland Snowballs
Okay, let’s be real – we’re not eating snowballs because they’re a health food! But since I know someone’s bound to ask (usually right after their third one), here’s the nutritional breakdown per snowball. Remember, these are estimates – your exact numbers might vary depending on the brands you use:
- Calories: 120 (worth every single one)
- Sugar: 12g (that’s what makes them so irresistible)
- Fat: 6g (mostly from the coconut and butter – the good stuff)
- Carbohydrates: 16g (mostly from those wholesome oats)
- Fiber: 2g (thanks, oats and coconut!)
- Protein: 2g (surprisingly not bad for a treat)
Important note: These values are approximate and can change based on exact measurements and ingredient brands. I’ve calculated based on standard products, but if you use sugar alternatives or different milk, your numbers will vary. Honestly though? When it comes to holiday treats like these, I say enjoy them without stressing the numbers – life’s too short not to savor Nan’s snowballs!
One more thing: If you’re watching specific dietary needs, remember these contain dairy (butter/milk) and gluten (from conventional oats). But don’t worry – I’ve got you covered with gluten-free adaptations in the FAQ section!
Frequently Asked Questions
Over the years, I’ve gotten so many questions about these Newfoundland Snowballs – here are the ones that come up most often with all the answers you need!
Can I use quick oats instead of rolled oats?
Technically yes, but I don’t recommend it! Quick oats absorb more liquid and give a mushier texture – you’ll lose that perfect chew my Nan’s recipe is famous for. If you’re in a pinch, use half quick oats and half rolled oats, but trust me, old-fashioned rolled oats make all the difference.
Can I Freeze Newfoundland Snowballs?
Absolutely! These no-bake chocolate coconut balls freeze beautifully for up to 1 month. Just place them in a single layer on a parchment-lined tray to freeze solid first (about 2 hours), then transfer to an airtight container with parchment between layers. Thaw in the fridge overnight when you’re ready to enjoy them again. Pro tip: Freeze some before the holidays so you’re always ready for surprise guests!
Are These Snowballs Gluten-Free?
They can be! While oats are naturally gluten-free, they’re often processed in facilities with wheat. For truly gluten-free snowballs, use certified gluten-free rolled oats. All other ingredients in the traditional recipe are naturally gluten-free, so this simple swap makes them safe for anyone avoiding gluten.
How long do Newfoundland Snowballs last?
Stored properly in an airtight container in the fridge, these holiday treats stay fresh for up to 1 week (though they rarely last that long in my house!). The coconut coating helps preserve them, but if you notice any dryness after a few days, just roll them in fresh coconut before serving – good as new!
Can I make these without coconut?
While coconut is traditional in Newfoundland Snowballs, you can substitute crushed graham crackers or even finely chopped nuts for the coating. The texture will be different, but still delicious. For the interior, replace the shredded coconut with an extra 1/4 cup of oats. It won’t be quite the same, but still makes a tasty chocolate oat ball!
Got more questions? Drop them in the comments – I’m happy to help troubleshoot just like my Nan did for me all those years ago!
Share Your Newfoundland Snowballs Experience
Nothing makes me happier than hearing about your adventures with this recipe! Did your kids go wild rolling the snowballs? Did your family demand seconds at holiday dinner? I want to hear all about it – the triumphs, the messy kitchen counters, even the “oops” moments (we’ve all had them!). Drop a comment below to let me know how your snowballs turned out, and don’t be shy about sharing your creative twists!
If you snapped a photo of your snowy coconut creations, I’d absolutely love to see them! Tag me on social media with #NansSnowballs so I can admire your handiwork. These little treats have brought so much joy to my family over the years, and it thrills me to think of them becoming part of your traditions too.
And hey – if you loved this recipe as much as we do, would you consider giving it a star rating? Those little stars help other home bakers discover Nan’s magical snowballs. Whether you’re a first-timer or a seasoned snowball roller, your feedback means the world to me. Happy baking, friends – may your holidays be as sweet as these coconut-coated bites of joy!
For more delicious recipes and inspiration, check out my Pinterest!
Print“3-Ingredient Newfoundland Snowballs Recipe – Pure Bliss!”

No-bake chocolate coconut balls, a traditional Canadian holiday treat. These easy-to-make snowballs combine rolled oats, cocoa, and shredded coconut for a chewy, fudgy dessert.
- Prep Time: 10 minutes
- Cook Time: 4 minutes
- Total Time: 1 hour 10 minutes
- Yield: 24 snowballs 1x
- Category: Dessert
- Method: No-bake
- Cuisine: Canadian
- Diet: Vegetarian
Ingredients
- 2 cups rolled oats
- 1 cup unsweetened shredded coconut (plus extra for rolling)
- 1/2 cup unsweetened cocoa powder
- 1 1/2 cups white sugar
- 1/2 cup butter
- 1/2 cup milk
- 1 tsp vanilla extract
Instructions
- In a large bowl, combine rolled oats, shredded coconut, and cocoa powder.
- In a saucepan, heat sugar, butter, and milk over medium heat. Bring to a gentle boil for 3–4 minutes, stirring constantly.
- Remove the syrup from heat and stir in the vanilla extract. Pour over the oat mixture and mix until fully coated.
- Let the mixture cool for 10–15 minutes, then roll into bite-sized balls.
- Coat each ball in extra shredded coconut, then chill in the fridge for at least 1 hour.
Notes
- Let the mixture cool slightly before rolling to avoid burning your hands.
- Store in an airtight container in the fridge for up to 1 week.
- For a festive touch, dust with powdered sugar before serving.
Nutrition
- Serving Size: 1 snowball
- Calories: 120
- Sugar: 12g
- Sodium: 40mg
- Fat: 6g
- Saturated Fat: 4g
- Unsaturated Fat: 1.5g
- Trans Fat: 0g
- Carbohydrates: 16g
- Fiber: 2g
- Protein: 2g
- Cholesterol: 10mg