
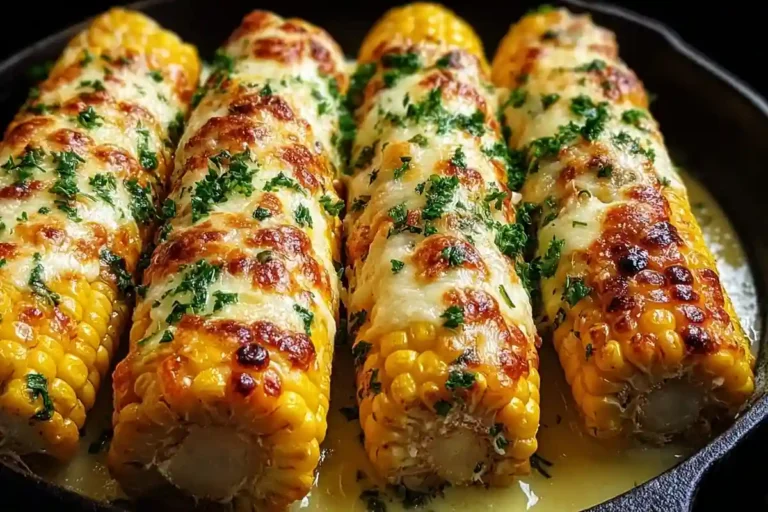
As summer rolls around, my thoughts drift to backyard barbecues and family gatherings. One dish that always steals the show is my Cheesy Garlic Corn on the Cob. Imagine this: sweet, juicy corn slathered in creamy garlic butter and topped with gooey cheese. It’s a quick solution for busy days and a surefire way to impress your loved ones. Whether you’re hosting friends or just enjoying a quiet dinner, this melty corn side dish will surely bring smiles all around. Let’s dive into this flavor bomb that’s perfect for any occasion!
Why You’ll Love This Cheesy Garlic Corn on Cob
This Cheesy Garlic Corn on the Cob is not just another side dish; it’s a celebration of flavor and simplicity! With just a handful of ingredients, you can whip up this melty masterpiece in no time. The combination of rich cheese and savory garlic transforms ordinary corn into an irresistible treat. Plus, it’s perfect for busy moms like us, making it an easy go-to for summer BBQs or family dinners. You’ll love how quickly it disappears from the table!
Ingredients for Cheesy Garlic Corn on Cob
Let’s gather the stars of our Cheesy Garlic Corn on the Cob! Each ingredient plays a vital role in creating that melty, savory goodness we crave. Here’s what you’ll need:
- Fresh Corn: Choose 4 ears of sweet, juicy corn for the best flavor. Husk them to reveal those golden kernels!
- Unsalted Butter: 3 tablespoons of melted butter adds richness. Unsalted allows you to control the saltiness.
- Garlic: 2 cloves, minced for that aromatic punch. Garlic brings a delightful depth of flavor.
- Paprika: A 1/2 teaspoon is optional but recommended for a subtle kick and vibrant color.
- Salt and Black Pepper: These seasonings are essential to bring out the flavors. Adjust to your taste.
- Shredded Cheese: 1 cup of mozzarella or Monterey Jack creates that gooey, melty texture we all love.
- Grated Parmesan: 1/4 cup adds a nutty flavor and a crispy top when baked.
- Fresh Parsley: Chopped, for garnishing. It adds a pop of color and freshness to the dish.
Feel free to get creative! You can swap mozzarella for your favorite cheese or even experiment with different herbs. For those who love a little heat, chili flakes are a fantastic addition. You’ll find the exact measurements for each ingredient at the bottom of the article, ready for printing!
How to Make Cheesy Garlic Corn on Cob
Now, let’s dive into the fun part—making our Cheesy Garlic Corn on the Cob! This process is simple, and I promise you’ll feel like a kitchen superstar. Follow these steps, and you’ll have a melty corn side dish that will leave everyone wanting more!
Step 1: Prepare the Corn
First things first, we need to prepare the corn. Start by husking the four ears of corn, peeling away those green leaves until you reveal the bright yellow kernels. Rinse them under cool water to remove any silk. While you’re at it, preheat your oven to 400°F or get your large oven-safe skillet nice and hot. This will set the stage for that delicious garlic butter flavor!
Step 2: Add Garlic Butter Mixture
Next, let’s make our garlic butter mixture. In a small bowl, combine the melted butter, minced garlic, salt, black pepper, and paprika if you’re up for a little kick. Brush this heavenly mixture generously over the corn. Don’t be shy! Every kernel deserves a good coat of that savory goodness. Trust me, it makes all the difference!
Step 3: Sear the Corn
Now, it’s time to give our corn some love in the skillet. Place the corn in your hot skillet and let it sear for about 3–4 minutes. Make sure to turn it every so often until all sides are slightly charred. This step not only enhances the flavor but also adds a beautiful golden hue. You’ll see why grilled garlic butter corn is such a hit!
Step 4: Add Cheese and Bake
Once the corn is beautifully seared, it’s time for the pièce de résistance: the cheese! Sprinkle the shredded mozzarella and grated Parmesan generously over the corn. Then, pop the skillet into the preheated oven. Bake for 8–10 minutes until the cheese is melted and bubbling like a delicious dream. The aroma wafting through your kitchen will have everyone flocking to the table!
Step 5: Garnish and Serve
Finally, let’s make this dish shine even brighter! Remove the corn from the oven and sprinkle it with fresh parsley for a pop of color and freshness. If you’re feeling adventurous, consider adding a drizzle of sour cream or chipotle mayo for an extra flavor boost. Serve hot and watch it disappear from your table in a flash!
Tips for Success
- Use fresh, in-season corn for the sweetest flavor and best texture.
- Don’t skip the searing step; it adds depth and a lovely char.
- Experiment with different cheeses for unique flavor combinations.
- For a spicy twist, add chili flakes to the garlic butter mixture.
- Serve immediately for the best melty cheese experience!
Equipment Needed
- Oven: A standard oven works perfectly; a toaster oven can be a handy alternative.
- Skillet: Use a cast-iron or non-stick skillet for best results; any oven-safe pan will do.
- Brush: A pastry brush for spreading the garlic butter; use a spoon if you don’t have one.
- Knife: For husking the corn and mincing garlic; a simple chef’s knife works great.
Variations
- Spicy Garlic Corn: Add diced jalapeños or a sprinkle of cayenne pepper to the garlic butter for a fiery kick.
- Herb-Infused Corn: Mix in fresh herbs like basil or cilantro into the garlic butter for a refreshing twist.
- Cheesy Broccoli Corn: Top the corn with steamed broccoli before adding the cheese for a nutritious boost.
- Vegan Option: Substitute butter with olive oil and use dairy-free cheese for a plant-based version.
- Sweet and Savory: Drizzle honey or maple syrup over the corn after baking for a delightful sweet contrast.
Serving Suggestions
- Pair with Grilled Meats: Serve alongside burgers, chicken, or ribs for a complete BBQ feast.
- Refreshing Drinks: Complement with iced tea, lemonade, or a light white wine for a refreshing sip.
- Presentation Tip: Serve directly on the grill or in a rustic wooden bowl for a charming touch.
- Side Salads: A light cucumber or tomato salad pairs beautifully with this cheesy corn.
Frequently Asked Questions (FAQs)
Q: Can I make Cheesy Garlic Corn on the Cob ahead of time?
A: While it’s best served fresh, you can prepare the garlic butter mixture and husk the corn in advance. Just assemble and bake when you’re ready to enjoy this melty corn side dish!
Q: What can I substitute for mozzarella cheese?
A: If you’re looking for a different flavor, Monterey Jack works wonderfully. You can also try a sharp cheddar for a more intense cheese experience!
Q: How can I make this recipe healthier?
A: You can use less butter and substitute part of the cheese with nutritional yeast for a cheesy flavor without the extra calories. Garlic parmesan corn on the cob can still be delicious and lighter!
Q: Can I grill the corn instead of baking it?
A: Absolutely! Grilled garlic butter corn is a fantastic option. Just follow the same steps but grill the corn instead of baking it for that smoky flavor.
Q: What are some good toppings for this corn dish?
A: Consider adding a sprinkle of chili flakes for heat or a drizzle of chipotle mayo for creaminess. Fresh herbs like cilantro or even crumbled bacon can elevate your cheesy baked corn recipe!
Final Thoughts
Making Cheesy Garlic Corn on the Cob is more than just cooking; it’s about creating memories around the dinner table. The joy of biting into that sweet, buttery corn, topped with melty cheese and aromatic garlic, is simply unbeatable. Whether it’s a casual family meal or a festive barbecue with friends, this dish brings everyone together, sparking laughter and conversation. So, roll up your sleeves and embrace the deliciousness of this melty corn side dish. It’s sure to become a beloved staple in your home, just like it has in mine!
PrintCheesy Garlic Corn on Cob: Elevate Your BBQ Game!

A melty flavor bomb and your new grill-night essential, Cheesy Garlic Corn on the Cob combines the richness of cheese with the savory flavor of garlic for a perfect BBQ side dish.
- Prep Time: 10 minutes
- Cook Time: 15 minutes
- Total Time: 25 minutes
- Yield: 4 servings 1x
- Category: Side Dish
- Method: Baking/Grilling
- Cuisine: American
- Diet: Vegetarian
Ingredients
- 4 ears of fresh corn, husked
- 3 tbsp unsalted butter, melted
- 2 garlic cloves, minced
- 1/2 tsp paprika (optional for a kick)
- Salt and black pepper to taste
- 1 cup shredded mozzarella (or Monterey Jack for extra melt)
- 1/4 cup grated Parmesan
- Fresh parsley, chopped (for garnish)
Instructions
- Preheat oven to 400°F or heat a large oven-safe skillet. Brush corn with melted butter mixed with garlic, salt, pepper, and paprika.
- In a hot skillet, quickly sear corn on all sides for 3–4 minutes until slightly charred.
- Sprinkle shredded mozzarella and Parmesan generously over the corn. Bake for 8–10 minutes until cheese is melted and bubbly.
- Remove from oven, sprinkle fresh parsley, and serve hot.
- For extra flavor, consider adding chili flakes or a drizzle of sour cream or chipotle mayo.
Notes
- For an extra kick, add chili flakes.
- For creaminess, drizzle with sour cream or chipotle mayo.
Nutrition
- Serving Size: 1 ear of corn
- Calories: 270
- Protein: 7g