
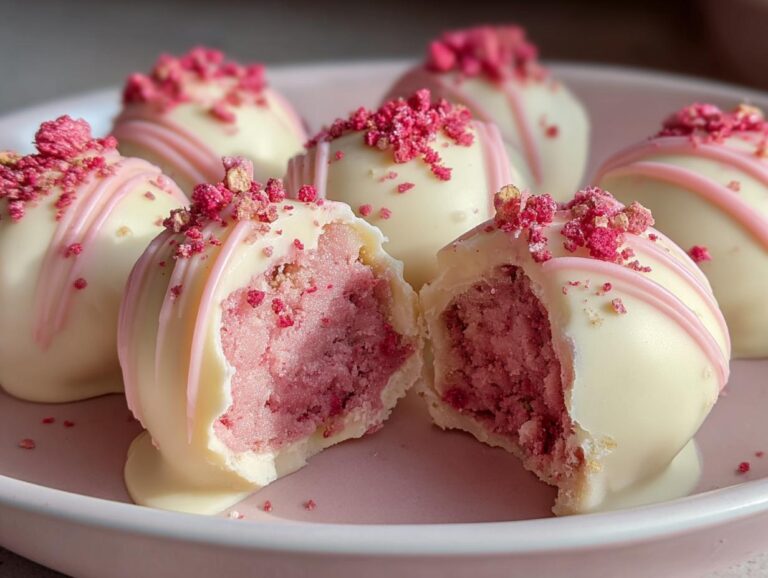
You know those moments when you need a showstopping dessert but don’t want to turn on the oven? That’s exactly why I fell in love with this strawberry truffle recipe! It all started when my niece begged me to recreate a TikTok trend she’d seen – these gorgeous pink bites that looked fancy but took minutes to make. Little did I know they’d become my go-to party trick.
What makes these truffles magic? They’re no-bake (hallelujah!), use simple ingredients you probably have already, and taste like little bites of strawberry cheesecake heaven. The white chocolate coating gives them that bakery-quality finish, while the cream cheese keeps them luxuriously creamy inside. Perfect for last-minute guests, Valentine’s Day, or just satisfying that sweet tooth craving!
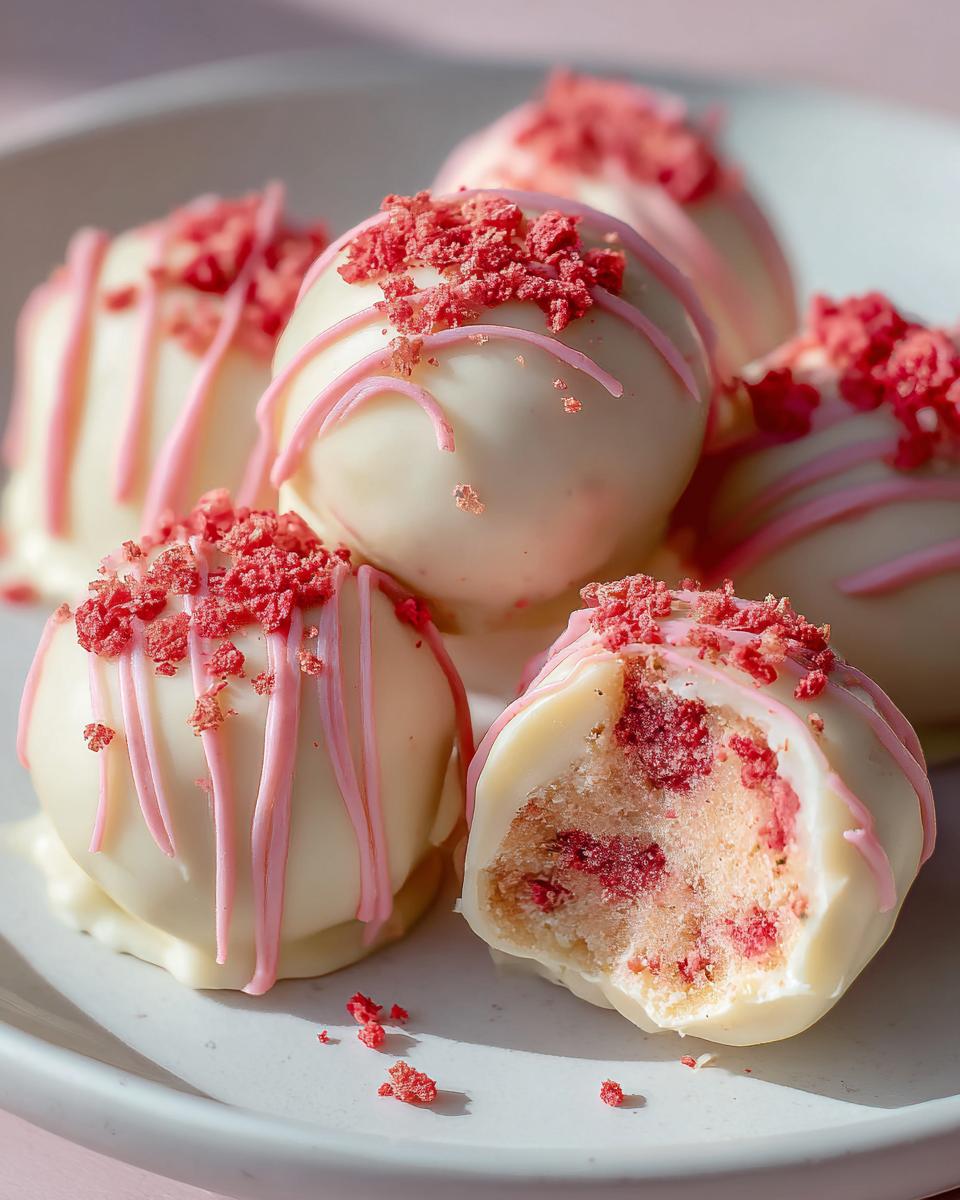
Why You’ll Love This Strawberry Truffle Recipe
Trust me, these little bites of joy will become your new obsession. Here’s why:
- No oven required – Perfect for hot summer days or when you just can’t deal with baking
- Impresses everyone – They look fancy but take less effort than frosting a cake
- TikTok-worthy – That gorgeous pink color and chocolate drizzle? Instant social media gold
- Creamy dreamy texture – The cream cheese makes them melt in your mouth
- Endless variations – Swap coatings, add sprinkles, or mix in different extracts
Seriously, I’ve made these for baby showers, girls’ nights, and even just because it’s Tuesday. They never last long!
Ingredients for Strawberry Truffles
Here’s the beautiful part – you only need a handful of simple ingredients to make these irresistible truffles. I always keep these stocked because you never know when a strawberry truffle emergency might strike (and in my house, that’s about twice a week)!
- 1 box strawberry cake mix (baked and completely cooled – I use Betty Crocker but any brand works)
- ½ cup cream cheese (must be softened to room temp – cold cream cheese will give you lumpy truffles)
- 1 tsp vanilla extract (I splurge on the good stuff – it makes a difference)
- 1 ½ cups white chocolate chips (for that gorgeous glossy coating)
- 1 tbsp coconut oil or shortening (this makes the chocolate dip smoothly – trust me on this!)
- Crushed freeze-dried strawberries or shortcake crumbs (for that pretty pink sprinkle on top)
- Optional: pink gel food coloring (if you want that extra vibrant pink color)
Pro tip from my many kitchen experiments: Measure the cream cheese properly! Too much makes sticky truffles, too little gives dry ones. I use exactly half a block of cream cheese (the 8oz size) and it’s perfect every time.
Equipment You’ll Need
One of the best things about this strawberry truffle recipe? You don’t need fancy equipment! Just grab these basic kitchen tools – I bet you already have most of them:
- Large mixing bowl (for combining all that strawberry cake goodness)
- Fork or wooden spoon (my grandma swore by wooden spoons for mixing)
- Baking sheet lined with parchment paper (the parchment is KEY for no-stick success)
- Microwave-safe bowl (for melting that white chocolate – I use my trusty glass measuring cup)
- Fork or dipping tool (for that perfect chocolate coating – I’ve used toothpicks in a pinch!)
- Measuring cups and spoons (because eyeballing cream cheese never ends well)
See? Nothing complicated here. The most “specialized” tool you might need is a microwave – and if you don’t have one, you can melt the chocolate using a double boiler on the stove. Easy peasy!
How to Make Strawberry Truffles
Now comes the fun part – turning those simple ingredients into gorgeous strawberry truffles! I promise it’s easier than it looks. Just follow these steps and you’ll have perfect little bites every time.
Step 1: Prepare the Cake Mixture
First, take your cooled strawberry cake and crumble it into fine crumbs in a large bowl. I like to use my hands – it’s oddly satisfying! You want it to look like damp sand with no big chunks. Then add your softened cream cheese and vanilla extract.
Here’s my secret: mix it with a fork at first, then switch to clean hands when it starts coming together. The dough should be moist but not sticky – kind of like playdough. If it’s too dry, add a teaspoon of milk. Too wet? A sprinkle more cake crumbs will fix it.
Step 2: Chill and Shape the Truffles
Roll tablespoon-sized portions into smooth balls – I aim for about 1-inch diameter for perfect bite-sized treats. Line them up on a parchment-covered baking sheet. Now the hard part: walk away!
Pop them in the fridge for at least 30 minutes (45 is even better). This chilling time is non-negotiable – it firms up the truffles so they won’t fall apart when you dip them. I learned this the hard way when my impatient early batches turned into strawberry puddles in the chocolate!
Step 3: Coat with White Chocolate
Melt your white chocolate chips with the coconut oil in 30-second bursts in the microwave, stirring between each. It should be smooth and runny but not hot (test a drop on your wrist – it should feel warm, not burning).
Now the magic happens! Using a fork, dip each chilled truffle, letting excess chocolate drip off before placing it back on the parchment. Work quickly before the chocolate sets. For extra pizzazz, immediately sprinkle with crushed strawberries or shortcake crumbs. If your chocolate starts thickening, just microwave for 5 more seconds.
Let them set at room temp (about 15 minutes) or speed it up with 5 minutes in the fridge. Then try not to eat them all at once!
Tips for Perfect Strawberry Truffles
After making dozens (okay, maybe hundreds) of these strawberry truffles, I’ve picked up some tricks that’ll take yours from good to “can I have the recipe?” amazing. These little nuggets of wisdom will save you from the mistakes I made so you don’t have to!
Getting that picture-perfect pink color
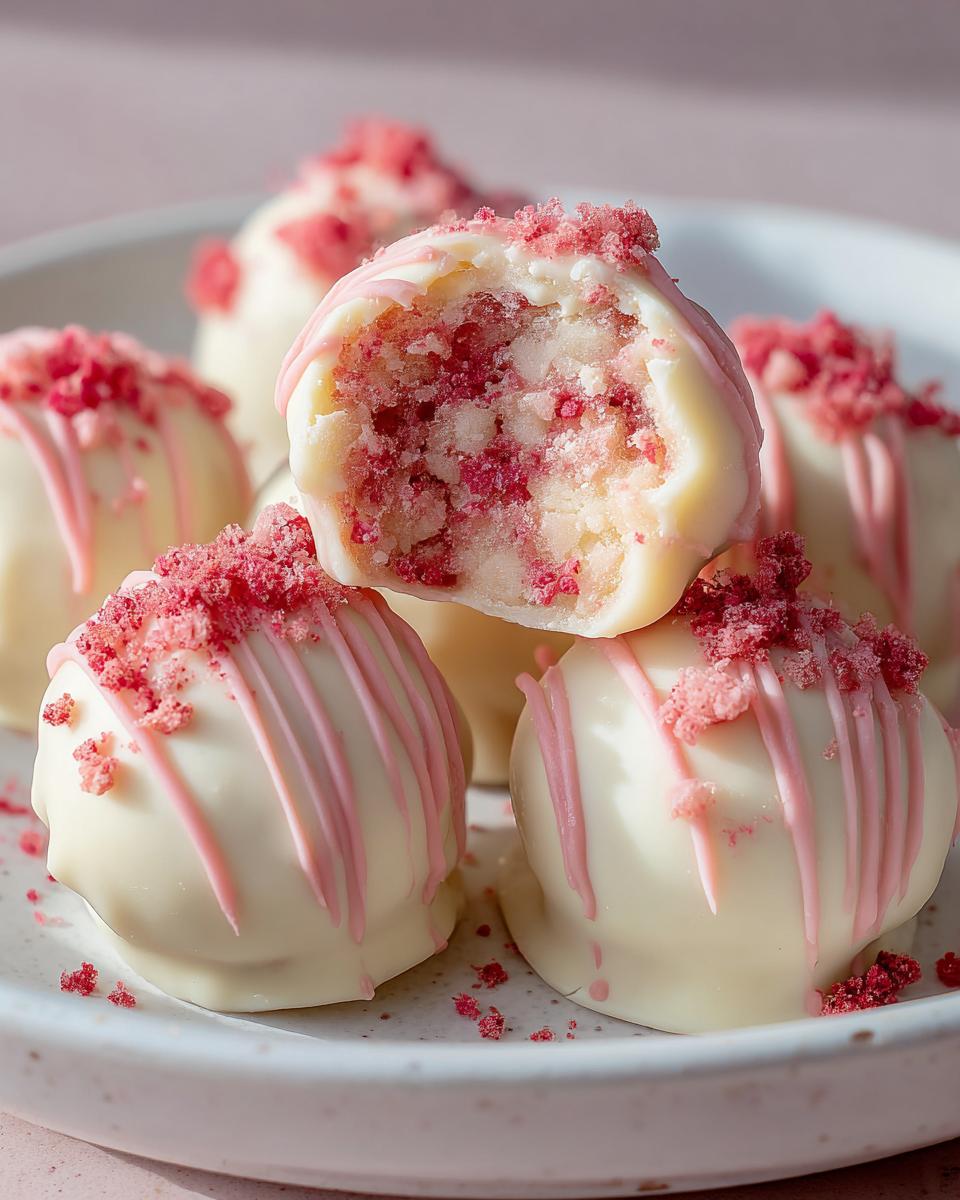
Want those Instagram-worthy vibrant pink truffles? Here’s my secret – add a drop or two of pink gel food coloring to the melted white chocolate before dipping. The liquid kind will make your chocolate seize up (learned that the hard way!), but gel blends in beautifully. For extra strawberry punch, mix some freeze-dried strawberry powder into your cake mixture too.
The golden rule of mixing
When combining your cake crumbs and cream cheese, stop mixing as soon as it comes together. Overworking the dough makes tough truffles instead of that dreamy melt-in-your-mouth texture we want. I mix until just combined – a few streaks of cream cheese are fine!
Chill like you mean it
I know, I know – waiting is the worst part. But trust me, those 30 minutes in the fridge make all the difference. If you’re really pressed for time, pop them in the freezer for 15 minutes instead. Just don’t skip this step unless you want strawberry truffle soup instead of perfect little bites!
Chocolate dipping pro moves
Here’s my foolproof method for that smooth, professional-looking coating:
- Tap your fork gently against the bowl’s edge to remove excess chocolate
- Slide the truffle off the fork with a toothpick – no finger marks!
- If chocolate gets too thick, add a tiny bit more coconut oil
And if you get some bare spots? Just drizzle more chocolate over the top – no one will ever know!
The best part? Even the “mess ups” still taste incredible. My kids happily volunteer as taste testers for any truffles that don’t meet my perfectionist standards (which happens more often than I’d like to admit!).
Variations and Substitutions
One of my favorite things about this strawberry truffle recipe is how easily you can mix it up! I’ve experimented with countless versions – some intentional, some born from “oops I’m out of this ingredient” moments. Here are my tried-and-true twists that still deliver amazing results:
When you don’t have strawberry cake mix
Ran out of strawberry cake mix? No problem! Use vanilla cake mix instead and add 1 teaspoon strawberry extract to the batter before baking. For extra strawberry flavor, mix in ¼ cup crushed freeze-dried strawberries with the cake crumbs. My neighbor swears this version tastes even more intensely fruity!
Chocolate coating alternatives
While I adore the classic white chocolate coating, sometimes I switch it up:
- Dark chocolate – Gives a rich contrast to the sweet strawberry center
- Pink candy melts – For extra vibrant color without food coloring
- Chocolate drizzle – Dip in white chocolate first, then zigzag dark chocolate on top
Pro tip: Whatever chocolate you use, keep that coconut oil in the mix – it makes all coatings smoother!
Cream cheese swaps
For a slightly different texture, try:
- Mascarpone – Makes the truffles extra creamy and luxurious
- Buttercream frosting – Use leftover frosting instead of cream cheese (about ¾ cup)
- Greek yogurt – For a lighter option (but they won’t hold shape as well)
Just remember – any substitutions will change the texture slightly, so chill them longer before dipping!
The beauty of these truffles is how forgiving they are. I once accidentally used lemon cake mix and added strawberry jam to the mixture – turned out delicious! Don’t be afraid to get creative with what you have on hand.
Serving and Storing Strawberry Truffles
Okay, let’s talk about the best part – showing off and keeping these gorgeous strawberry truffles fresh! I’ve learned a few tricks over the years that make them look extra special and last longer (though in my experience, they rarely stick around for more than a day or two).
Presentation Perfection
These little bites are almost too pretty to eat – almost! Here’s how I make them shine:
- Mini cupcake liners – Makes them look like they came from a fancy bakery
- Edible gold dust – Just a light sprinkle for special occasions
- Fresh strawberry slices – Arrange a few on the serving plate for a pop of color
- Drizzles galore – Melt extra chocolate and do zigzags over the whole batch
My favorite trick? Serve them on a tiered dessert stand – it instantly elevates them from “snack” to “centerpiece” status!
Keeping Them Fresh
These truffles will keep beautifully in the fridge for up to a week (if they last that long!). Here’s how I store mine:
- Airtight container is a must – I use a glass container with a tight lid
- Parchment between layers – Prevents them from sticking together
- Keep chilled – The cream cheese means they shouldn’t sit out more than 2 hours
Want to freeze them? You can! Just skip the chocolate coating, freeze the uncoated balls for up to 3 months, then thaw and dip when ready to serve. Works like a charm!
One last tip – if you’re taking these to a party, bring them in a cooler with ice packs. Nothing worse than arriving with melted chocolate! Trust me, I’ve had that disaster happen more times than I’d like to admit.
Strawberry Truffle Recipe FAQs
Over the years, I’ve gotten so many questions about these irresistible strawberry truffles – and I love helping people troubleshoot! Here are the answers to the ones I hear most often:
Can I freeze these truffles?
Absolutely! Here’s how: freeze the uncoated cake balls first on a parchment-lined tray (about 2 hours), then transfer to an airtight container with parchment between layers. They’ll keep for 3 months frozen. When ready to serve, thaw in the fridge overnight, then dip in chocolate as usual. Perfect for making ahead for parties!
How do I prevent the chocolate coating from cracking?
Oh boy, this used to drive me crazy! The secret is making sure your truffles and chocolate are at the right temperature. If the chilled truffles are too cold when dipped, the chocolate contracts as it sets and cracks. Let them sit at room temp for 5 minutes before dipping. Also, adding that tablespoon of coconut oil to the chocolate keeps it flexible as it hardens.
My mixture is too sticky – help!
Been there! If your dough sticks to your hands, it probably needs more cake crumbs. Add a tablespoon at a time until it’s workable. Pro tip: lightly wet or oil your hands before rolling – the dough won’t stick as much. And remember – chilled dough is always easier to handle!
Can I make these without cream cheese?
You can, but the texture won’t be as creamy. For a dairy-free version, try using coconut cream (the thick part from a can of full-fat coconut milk) or vegan cream cheese. The truffles will be a bit softer, so chill them longer before dipping. I’ve also used buttercream frosting in a pinch – about 3/4 cup works for one cake mix.
Why did my white chocolate turn lumpy when melting?
White chocolate is fussy – even a drop of water can make it seize up! Always use a completely dry bowl, and melt in short bursts, stirring between each. If it does get lumpy, add a tiny bit more coconut oil (1/2 teaspoon at a time) and keep stirring. And never cover the bowl while melting – the steam causes clumps. Learned that one the hard way!
Nutritional Information
Now, I’m no nutritionist, but since we’re all curious about what we’re eating (especially when we’ve popped three truffles in a row – no judgment here!), here’s the estimated nutritional breakdown per truffle:
- Calories: 150
- Sugar: 12g
- Fat: 8g (5g saturated)
- Carbohydrates: 18g
- Protein: 2g
Remember, these are estimates based on standard ingredients – your exact numbers might vary depending on brands and any substitutions. And let’s be real, when something tastes this good, sometimes the numbers just don’t matter as much as that first blissful bite!
Final Thoughts
Well, there you have it – my absolute favorite way to make strawberry truffles that look fancy but couldn’t be easier! I still remember the first time I made these for a girls’ night – they disappeared so fast I barely got one myself. Now they’re my signature treat that friends beg me to bring to every gathering.
The best part? Even if yours don’t turn out picture-perfect the first try (mine certainly didn’t!), they’ll still taste amazing. Some of my “ugly duckling” batches with lopsided chocolate coatings have been the most delicious. Baking – or in this case, no-baking – is all about having fun and enjoying the process.
I’d love to hear how your strawberry truffles turn out! Tag me if you share photos – nothing makes me happier than seeing your kitchen creations. And if you come up with any brilliant new variations, please tell me! I’m always looking for excuses to make another batch (not that I need many). Happy truffle-making, friends!
PrintIrresistible Strawberry Truffle Recipe in Just 30 Minutes

Delicious no-bake strawberry truffles made with strawberry cake, cream cheese, and white chocolate coating. Perfect for parties and sweet cravings.
- Prep Time: 20 minutes
- Cook Time: 0 minutes
- Total Time: 50 minutes
- Yield: 24 truffles 1x
- Category: Dessert
- Method: No-Bake
- Cuisine: American
- Diet: Vegetarian
Ingredients
- 1 box strawberry cake mix (baked & cooled)
- ½ cup cream cheese (softened)
- 1 tsp vanilla extract
- 1 ½ cups white chocolate chips (for coating)
- 1 tbsp coconut oil or shortening
- Crushed freeze-dried strawberries or shortcake crumbs (for garnish)
- Optional: pink gel food coloring for deeper color
Instructions
- Crumble the baked strawberry cake into fine crumbs.
- Add softened cream cheese and vanilla to the crumbs. Mix until a thick dough forms.
- Roll into 1-inch balls and place on a parchment-lined tray. Chill for at least 30 minutes.
- Melt white chocolate with coconut oil, then dip chilled truffles using a fork. Place on tray and drizzle with extra melted chocolate.
- Sprinkle with shortcake crumbs or freeze-dried strawberries before the coating sets. Pop in the fridge until firm.
Notes
- Store truffles in the fridge for up to a week.
- For a richer color, add pink gel food coloring to the melted chocolate.
Nutrition
- Serving Size: 1 truffle
- Calories: 150
- Sugar: 12g
- Sodium: 100mg
- Fat: 8g
- Saturated Fat: 5g
- Unsaturated Fat: 2g
- Trans Fat: 0g
- Carbohydrates: 18g
- Fiber: 0.5g
- Protein: 2g
- Cholesterol: 10mg