
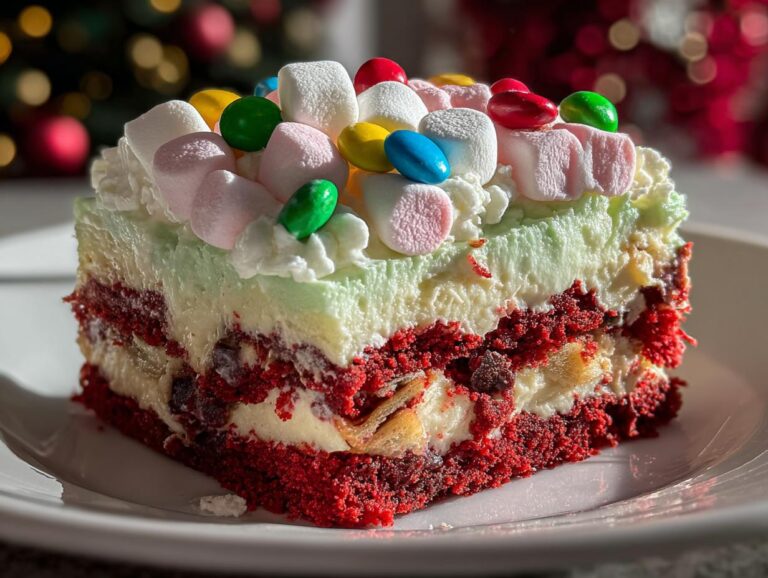
Nothing says “holiday cheer” like a dessert that’s as fun to make as it is to eat! This Christmas Dessert Lasagna is your new secret weapon—a stunning, no-bake layered masterpiece that’ll have everyone at the party asking for seconds (and the recipe). Imagine: tender red velvet cake squares stacked with creamy pistachio pudding, a luscious whipped cream cheese layer, and a sprinkle of festive candies on top. It’s like holiday magic in every bite, and the best part? You don’t even need to turn on the oven. Whether you’re hosting a cookie exchange or just want to treat yourself, this dessert is as easy as it is gorgeous. Pro tip: make it the night before so the flavors melt together into something truly special. Let’s get layering!
Why You’ll Love This Christmas Dessert Lasagna
Trust me, this dessert will become your new holiday tradition – and here’s why:
• No-bake magic: After baking the simple cake base (the only oven time needed), the rest comes together in minutes with zero heat. Perfect for when your oven’s already overflowing with holiday dishes!
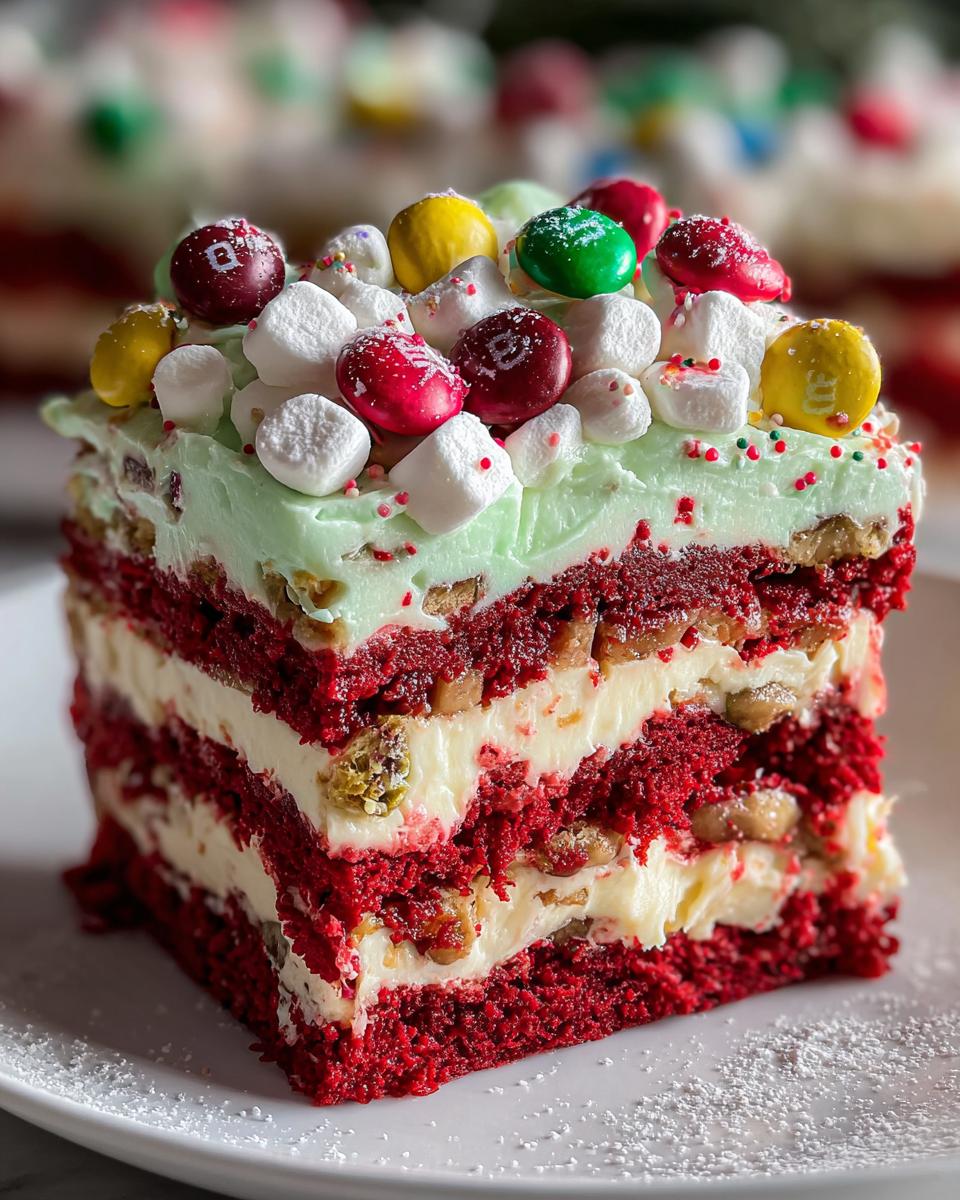
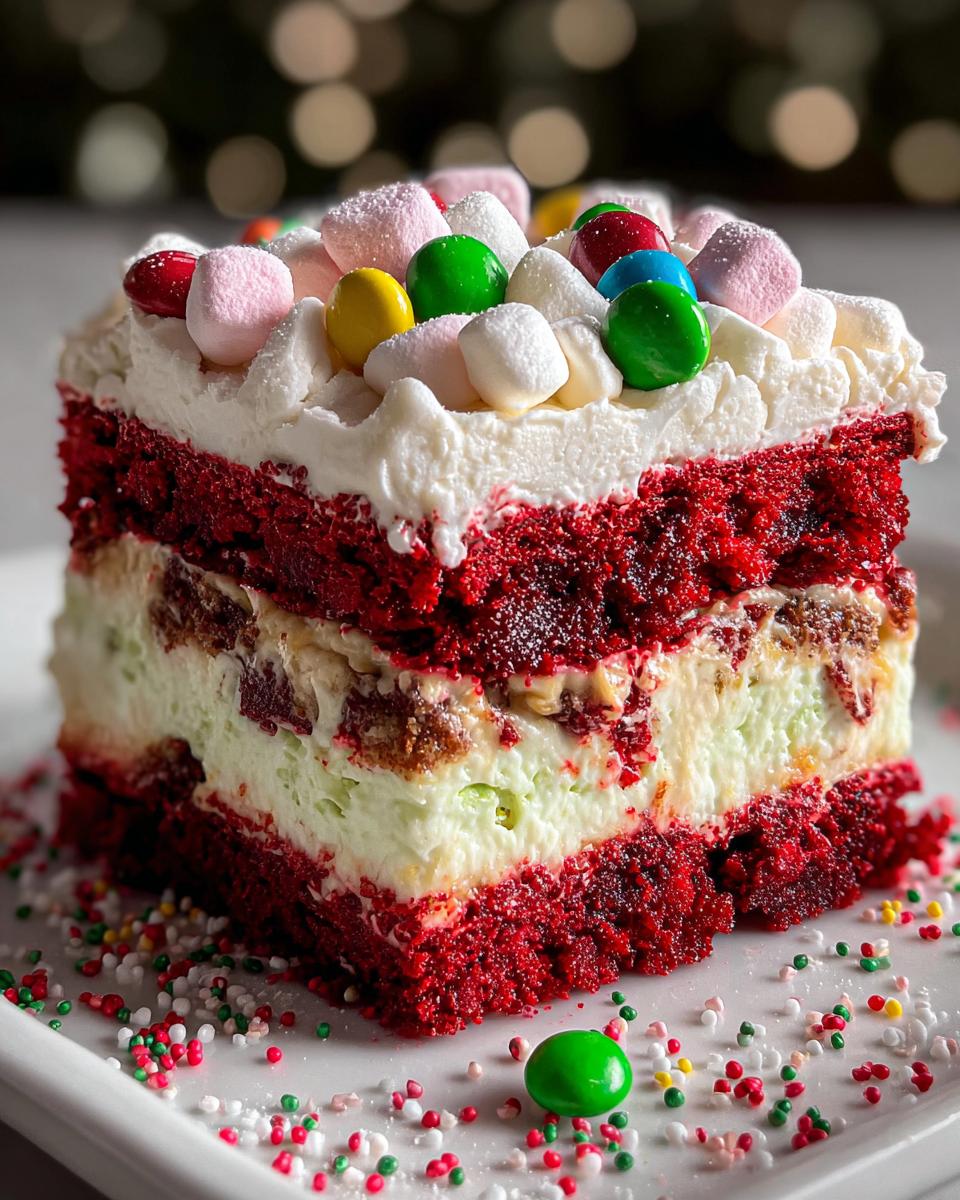
• Showstopper looks: Those vibrant red and green layers peeking through the whipped topping? Total holiday eye candy. I love using crushed candy canes for a festive crunch.
• Crowd-pleasing flavors: The combo of rich red velvet, creamy pistachio pudding, and tangy cream cheese makes every bite exciting. My niece actually prefers this over pie now!
• Make-ahead friendly: It actually tastes better after chilling overnight – one less thing to stress about on party day.
• Endlessly adaptable: Swap pistachio for cheesecake pudding, use gluten-free cake mix, or top with seasonal sprinkles. I’ve made at least six variations over the years!
Ingredients for Christmas Dessert Lasagna
Gather these simple ingredients – I promise you probably have most in your pantry already! The magic happens when they all come together:
- 1 box (15.25 oz) red velvet cake mix – plus whatever it calls for on the box (usually 3 large eggs, 1/2 cup vegetable oil, and 1 cup water)
- 1 box (3.4 oz) instant pistachio pudding mix – the small box, not cook-and-serve!
- 2 cups cold milk – I use whole milk for creaminess, but 2% works too
- 1 container (8 oz) whipped topping, thawed – the fluffy stuff in the frozen aisle
- 1 block (8 oz) cream cheese, softened to room temperature – this is crucial for smooth mixing!
- 1/2 cup powdered sugar – sifted if you’re feeling fancy
- 1 tsp vanilla extract – the good stuff makes a difference
- 1 cup mini marshmallows – these add such a fun texture
- Red and green M&M’s or candies – go wild with holiday colors!
- Crushed candy canes or sprinkles (optional) – my secret weapon for extra festive crunch
Ingredient Substitutions & Notes
Don’t stress if you’re missing something – this recipe is super flexible! Here are my favorite swaps:
• Gluten-free? Use your favorite GF red velvet cake mix – they work just as well.
• Not a pistachio fan? Try vanilla, cheesecake, or even white chocolate pudding instead.
• Dairy-free? Swap in almond milk and dairy-free cream cheese – the texture might be slightly different but still delicious.
• Short on time? Use pre-baked cake squares from the bakery section (I won’t tell!).
• Want more chocolate? Add chocolate chips between layers or use chocolate pudding.
• Pro tip: If your cream cheese isn’t soft enough, microwave it for 10-15 seconds – just don’t let it melt!
How to Make Christmas Dessert Lasagna
Okay, let’s dive in! This dessert comes together in four simple steps – I promise it’s easier than wrapping presents (and way more fun). Just follow along and you’ll have a stunning holiday treat in no time!
Step 1: Prepare the Red Velvet Base
First things first – bake that cake! Preheat your oven to 350°F and grease a 9×13-inch baking dish (I use butter for extra flavor). Mix up the red velvet cake batter according to the box directions – eggs, oil, water, the whole shebang. Pour it into your prepared pan and bake for about 30 minutes, or until a toothpick comes out clean. Let it cool completely – I usually give it a good hour. Once cooled, cut it into small squares right in the pan (about 1-inch pieces). Don’t worry if they’re not perfect – they’ll get covered in deliciousness soon!
Step 2: Make the Cream Cheese Layer
Now for my favorite part – the creamy dreamy layer! In a large bowl, beat your softened cream cheese (remember – room temp is key!) with the powdered sugar and vanilla for about 2 minutes until it’s completely smooth. No lumps allowed! Then gently fold in half of the whipped topping until it’s all incorporated. Spread this heavenly mixture evenly over your red velvet squares, making sure to get into all the corners. I like using an offset spatula for this – it gives me that smooth bakery-style finish.
Step 3: Assemble the Pistachio Pudding Layer
Time for the pistachio magic! In another bowl, whisk together the pudding mix and cold milk for about 2 minutes. You’ll know it’s ready when the mixture coats the back of a spoon thickly. Let it sit for about 5 minutes to thicken up a bit more, then carefully spread it over the cream cheese layer. Work quickly but gently – you want distinct layers, not a marbled mess! If you’re using a different pudding flavor, the same rules apply.
Step 4: Decorate & Chill
The fun part! Spread the remaining whipped topping over the pudding layer – this is your blank canvas! Now go wild with decorations. I love creating little holiday patterns with the M&M’s and marshmallows – last year I made a Christmas tree shape that was almost too cute to eat. Sprinkle on some crushed candy canes or holiday sprinkles for extra festive flair. Finally – and this is crucial – cover tightly with plastic wrap and chill for at least 2 hours (overnight is even better). The wait is torture, but trust me, it’s worth it!
Tips for Perfect Christmas Dessert Lasagna
After making this dessert more times than I can count (holiday potlucks, anyone?), I’ve picked up some foolproof tricks to make yours absolutely perfect:
- Chill your mixing bowl – Pop it in the freezer for 10 minutes before making the cream cheese layer. Cold bowls help everything stay fluffy!
- Cut with a warm knife – Dunk your knife in hot water and wipe dry between slices for those picture-perfect clean edges.
- Wait to decorate – Add sprinkles and candy canes right before serving so colors don’t bleed into the whipped topping.
- Press cake squares gently – After cutting, use a spoon to lightly press them together so the layers hold better.
- Make it boozy – Add a tablespoon of peppermint schnapps to the cream cheese layer for adult holiday cheer!
- Layer in stages – Let each layer set for 15 minutes in the fridge before adding the next for super-defined stripes.
- Use the right dish – A clear glass pan shows off those gorgeous layers – perfect for holiday Instagram shots!
The secret? Don’t stress – even if your layers aren’t magazine-perfect, it’ll still taste amazing!
Serving & Storage
Here’s how to keep your Christmas Dessert Lasagna looking and tasting its best:
When it’s time to serve, I always grab my trusty chef’s knife and run it under hot water first. That quick warm-up makes slicing through those beautiful layers a breeze – no squished edges! Wipe the blade clean between cuts for picture-perfect squares every time.
Leftovers? Ha! Just kidding – though this dessert tends to disappear fast. If you do have some, simply cover the pan tightly with plastic wrap (press it right against the surface to prevent drying) and refrigerate for up to 3 days. The flavors actually deepen overnight – my husband swears day-two slices taste even better!
One important note: don’t freeze this dessert. The whipped layers turn grainy when thawed. But let’s be real – between holiday guests and midnight snack attacks, it probably won’t last long enough to freeze anyway!
Christmas Dessert Lasagna Variations
Oh, the possibilities! Once you’ve mastered the classic version, try these fun twists that keep the holiday spirit alive while shaking things up:
Candy Cane Crunch: Swap the pistachio pudding for peppermint-flavored instant pudding and top with crushed candy canes instead of M&M’s. The cool mint pairs perfectly with the rich red velvet – it’s like Christmas in every bite!
Chocolate Cherry Bliss: Use chocolate cake mix instead of red velvet, cherry pie filling between layers, and chocolate pudding. Top with chocolate shavings and maraschino cherries for a Black Forest-inspired treat.
Eggnog Delight: Replace the milk in the pudding with eggnog (seasonal alert!) and add a sprinkle of nutmeg to the cream cheese layer. Instant holiday nostalgia!
Tropical Christmas: Coconut cake base, banana pudding layer, and toasted coconut flakes on top. Perfect for those dreaming of a warm-weather holiday!
The best part? Every variation still comes together just as easily as the original – just layer, chill, and watch the compliments roll in!
Nutritional Information
Okay, let’s be real – we’re not eating dessert lasagna for its health benefits! But since I know some of you like to keep track (or need to for dietary reasons), here’s the scoop on what’s in each delicious serving. Just remember – these numbers are estimates based on standard ingredients, and your exact counts might vary depending on brands and any substitutions you make.
Per serving (1 bar):
- Calories: 340 (worth every one!)
- Sugar: 28g (it’s the holidays – treat yourself!)
- Sodium: 320mg
- Fat: 14g
- Saturated Fat: 8g
- Carbohydrates: 48g
- Fiber: 1g
- Protein: 4g
- Cholesterol: 30mg
Want to lighten it up a bit? Try using sugar-free pudding mix, reduced-fat cream cheese, and light whipped topping. But between you and me? The full-fat version tastes so much better when it’s a special occasion treat!
FAQs About Christmas Dessert Lasagna
I’ve gotten so many questions about this festive layered dessert over the years – here are the answers to everything you might wonder before diving in:
Can I make Christmas Dessert Lasagna ahead of time?
Absolutely! In fact, I recommend it. The flavors meld beautifully when it sits overnight in the fridge – just hold off on adding the final candy decorations until right before serving so they stay crisp. Cover tightly with plastic wrap pressed directly on the surface to prevent drying.
How do I prevent soggy layers?
The trick is letting each component cool completely before assembling. That red velvet cake base needs to be fully cooled (I wait at least an hour), and the pudding should thicken for about 5 minutes after mixing. Also, don’t skimp on the chilling time – those 2+ hours in the fridge let everything set up perfectly.
Can I use a different pudding flavor?
Of course! While pistachio gives that classic holiday color, vanilla, cheesecake, or even white chocolate pudding work wonderfully. For a peppermint twist, try using instant peppermint pudding mix – it’s magical with crushed candy canes on top!
What’s the best way to cut clean slices?
My secret weapon? A knife dipped in hot water! Run your sharpest knife under hot water, wipe it dry, then make your cut. Repeat between slices for picture-perfect portions every time. A serrated knife also works wonders for cutting through the layers without squishing them.
Can I make this gluten-free?
Yes! Simply swap in your favorite gluten-free red velvet cake mix (I’ve had great results with Bob’s Red Mill). The rest of the ingredients are naturally GF, just double-check your pudding mix labels if that’s a concern.
Here you can find more Christmas dessert ideas.
PrintIrresistible Christmas Dessert Lasagna in 4 Easy Layers

A festive no-bake layered dessert with red velvet cake, pistachio pudding, and cream cheese layers topped with colorful candies.
- Prep Time: 25 minutes
- Cook Time: 30 minutes
- Total Time: 2 hours 55 minutes
- Yield: 12 servings 1x
- Category: Dessert
- Method: No-Bake
- Cuisine: American
- Diet: Vegetarian
Ingredients
- 1 box red velvet cake mix (plus eggs, oil, water as needed)
- 1 box instant pistachio pudding mix (3.4 oz)
- 2 cups cold milk
- 1 container (8 oz) whipped topping, thawed
- 1 block (8 oz) cream cheese, softened
- 1/2 cup powdered sugar
- 1 tsp vanilla extract
- 1 cup mini marshmallows
- Red and green M&M’s or candies for topping
- Crushed candy canes or sprinkles (optional)
Instructions
- Bake the red velvet cake as directed and let cool. Slice into squares.
- Beat cream cheese, powdered sugar, and vanilla until smooth. Fold in half the whipped topping and spread over the cake.
- Mix pistachio pudding with cold milk until thick. Spread over the cream cheese layer.
- Top with remaining whipped topping and decorate with marshmallows, M&M’s, and candy canes.
- Chill for at least 2 hours before serving.
Notes
- For a firmer texture, chill overnight.
- Substitute pudding flavors for variety.
- Use gluten-free cake mix if needed.
Nutrition
- Serving Size: 1 bar
- Calories: 340
- Sugar: 28g
- Sodium: 320mg
- Fat: 14g
- Saturated Fat: 8g
- Unsaturated Fat: 4g
- Trans Fat: 0g
- Carbohydrates: 48g
- Fiber: 1g
- Protein: 4g
- Cholesterol: 30mg