
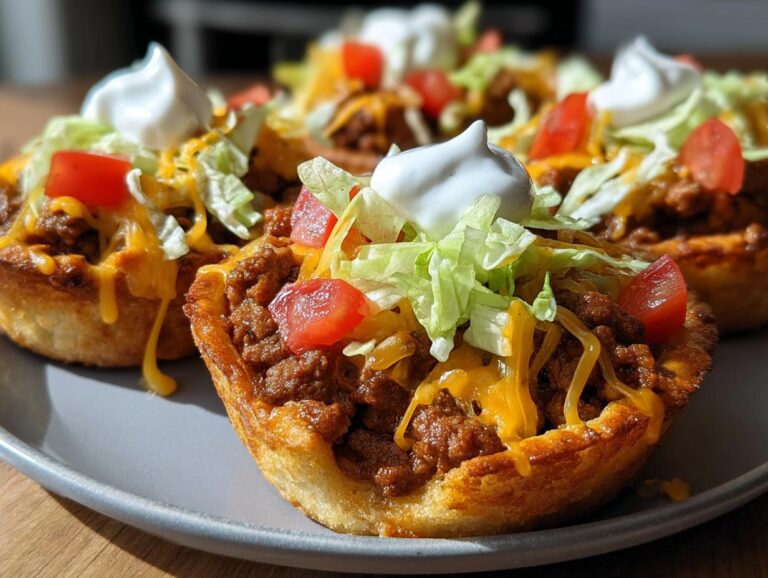
You know those nights when you need dinner on the table fast, or when friends suddenly show up for game day? That’s when my Cheesy Taco Biscuit Cups save the day every time. These little flavor bombs combine all the best parts of tacos with the ease of refrigerated biscuit dough – genius, right? My kids go absolutely wild for them (though let’s be honest, so do all the grownups at our parties). The best part? You’re just 25 minutes away from golden, cheesy, taco-stuffed perfection.
Ingredients for Cheesy Taco Biscuit Cups
Gather these simple ingredients – trust me, you probably have most of them already! The magic happens with just:
- 1 lb lean ground beef (85/15 works great – not too greasy)
- 1 packet (1 oz) taco seasoning (my secret? Use two-thirds for less salt)
- ⅓ cup water (just enough to make the seasoning hug the beef)
- 1 can refrigerated biscuit dough (that standard 16.3oz tube with 8 biscuits)
- 1 cup shredded cheddar (the orange stuff melts like a dream)
- ½ cup shredded lettuce (iceberg for crunch)
- ½ cup diced tomatoes (seeds removed so they don’t make things soggy)
- ½ cup sour cream (for dolloping)
- Olive oil or spray (just a spritz for the muffin tin – don’t skip this!)
How to Make Cheesy Taco Biscuit Cups
Okay, let’s turn these ingredients into golden pockets of joy! First things first – crank that oven to 375°F (190°C) so it’s nice and hot when we’re ready to bake. Here’s how we’ll work our magic:
- Brown the beef: Get a skillet screaming hot over medium-high heat (I test mine by flicking a few water droplets – if they sizzle, we’re good). Crumble in that ground beef and cook until there’s absolutely no pink left, about 5 minutes. Drain off any excess grease – we want flavor, not a grease bomb!
- Season it right: Sprinkle in your taco seasoning and water, then reduce heat to medium-low. Let it simmer for 2-3 minutes until the mixture thickens enough to coat your spatula, but still looks juicy. Remove from heat.
- Shape the cups: While the meat cools slightly, pop open that biscuit can (you know that satisfying “whomp” sound!). Working one at a time, press each biscuit between your palms until it’s about ¼-inch thick – imagine a small tortilla size. Gently press into greased muffin cups, making sure the dough comes about halfway up the sides.
- Fill & bake: Spoon a heaping tablespoon of taco meat into each cup, then shower with cheese (don’t be shy!). Bake for 12-15 minutes until the biscuit edges turn golden brown and the cheese gets all bubbly and gorgeous.
- The grand finale: Let them rest for 2 minutes (I know, torture!) so the cheese sets slightly, then pile on those fresh toppings. The contrast of warm biscuit and cool toppings? Absolute perfection.
Preparing the Taco Filling
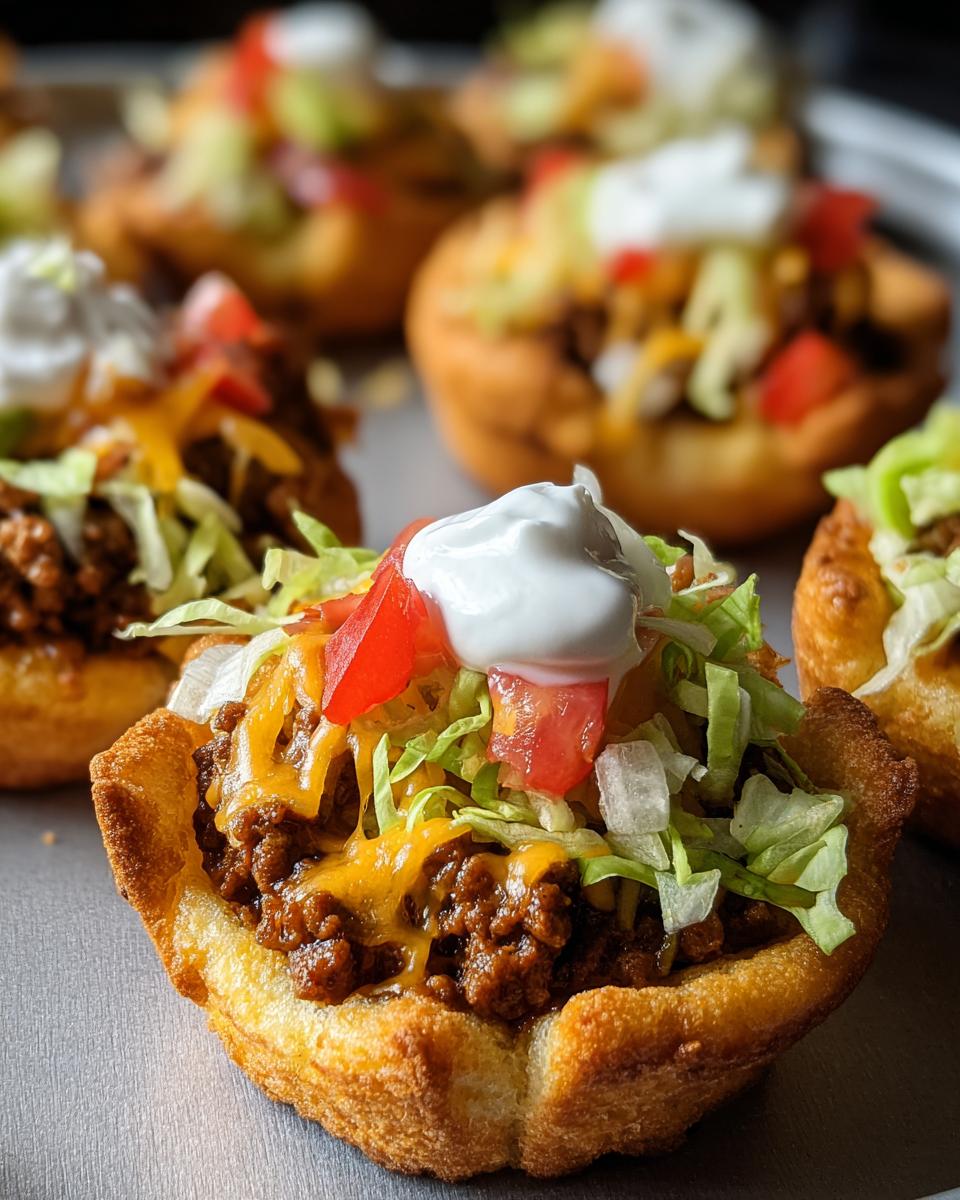
This is where the flavor foundation happens! Break up the beef really well as it cooks – we want fine crumbles, not big chunks. After draining, I like to return the skillet to the heat for 30 seconds to evaporate any remaining moisture before adding the seasoning. When you stir in the water, it should immediately start bubbling and creating this glossy coating on the meat. That’s when you know your filling will be packed with flavor in every bite!
Assembling the Biscuit Cups
Here’s my biscuit-stretching technique: place one on a clean surface and use your fingers to press outward from the center, rotating as you go. They should end up about 4 inches across. When pressing into the muffin tin, pay extra attention to the bottom edges – if they’re too thin, they might burn. I like to leave the tops slightly ruffled for that homemade look. And that meat measurement? Exactly enough so each cup gets generously filled without overflowing when the cheese melts. Trust me, I’ve done the overflow cleanup – not fun!
Why You’ll Love These Cheesy Taco Biscuit Cups
Oh my stars, these Mini Taco Muffin Bites are about to become your new obsession! Here’s why:
- 30-minute magic: From fridge to table faster than pizza delivery – perfect when hangry kids (or adults!) start circling the kitchen.
- Kid-approved stamp: My picky eater actually begs for these! Something about eating tacos with their hands just makes vegetables exciting.
- Endless customization: Swap toppings for game day (jalapeños for heat lovers), taco Tuesday (extra guac!), or breakfast (scrambled eggs instead of beef – trust me).
- Party superstar: That moment when your “Easy Tex-Mex Appetizer” disappears faster than you can refill the platter? Yeah, get ready for that.
- No-fail fun: Even when my biscuit cups come out lopsided (hey, it happens), they still taste like crispy, cheesy happiness.
Tips for Perfect Cheesy Taco Biscuit Cups
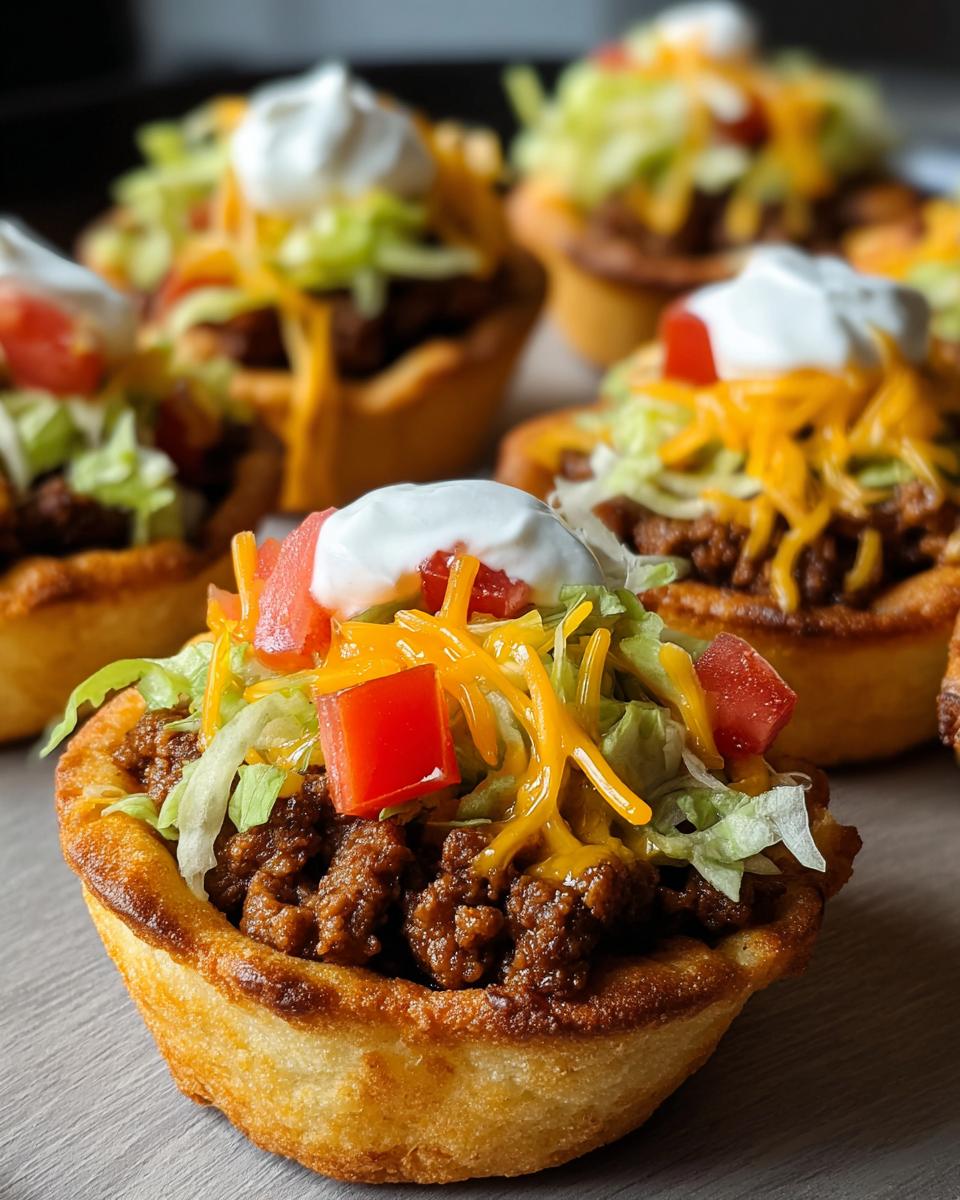
Listen, I’ve made these enough times to learn all the little tricks—here’s how to nail them every time:
- Warm up those biscuits! Let the dough sit out for 10 minutes—it’ll stretch like a dream without tearing (cold dough fights back, trust me).
- Cheese armor: Sprinkle a pinch of cheese before adding the meat—it creates a crispy barrier so your biscuit cups stay sturdy, not soggy.
- Patience pays: Wait 5 minutes after baking before adding toppings. That quick rest keeps the biscuit crisp while the cheese goes from “molten lava” to “perfectly gooey.”
Ingredient Substitutions & Variations
Listen, I know we don’t always have exactly what a recipe calls for – that’s why I love how flexible these Cheesy Taco Biscuit Cups are! Here are my favorite swaps and twists:
- Meat lovers: Ground turkey works beautifully (just add an extra teaspoon of oil). For vegetarians? Try crumbled tofu or plant-based meat – same great taco flavor!
- Dairy swaps: Greek yogurt makes a tangy sour cream alternative. And that cheddar? Pepper Jack or Mexican blend cheese takes these to flavor town.
- Gluten-free: Use your favorite GF biscuit dough – just roll it slightly thicker since it doesn’t stretch as well.
- Flavor boosters: Stir in ¼ cup black beans or corn with the meat filling – it adds awesome texture and stretches the filling further.
The best part? These variations still give you that crispy, cheesy magic that makes this recipe so special.
Storing and Reheating Cheesy Taco Biscuit Cups
Okay, confession time—these rarely last long in our house! But when we do have leftovers (miracle of miracles), here’s what I’ve learned:
- Short-term storage: Keep unfilled biscuit cups in an airtight container for up to 2 days—any longer and they start losing that perfect crispness.
- Reheating magic: That air fryer you love? It’s perfect here! Just 3 minutes at 350°F brings back the golden crunch (microwaving makes them sad and soggy—learned that the hard way).
- Freezer tip: I don’t recommend freezing—the biscuit texture turns oddly tough. But honestly? They’re so quick to make fresh, you won’t need to!
Pro tip: Store toppings separately and assemble fresh—nothing worse than wilted lettuce on day two!
Nutritional Information for Cheesy Taco Biscuit Cups
Now, I’m no nutritionist, but here’s the scoop on what’s in these little flavor bombs! (Remember, these are estimates—your exact amounts might vary a smidge.) Each golden cup packs about:
- 300 calories (worth every single one!)
- 17g protein from that beef and cheese—hello, muscle fuel!
- 22g carbs (mostly from that fluffy biscuit goodness)
- 18g fat (because let’s be real—cheese and beef make life delicious)
What I love? These give you way more protein than your average snack—perfect for keeping hungry kids (or snack-attack adults) satisfied longer!
Common Questions About Cheesy Taco Biscuit Cups
I get asked about these Weeknight Taco Cup Dinner lifesavers all the time—here are the answers to the questions that pop up most often:
Can I use homemade biscuit dough? Absolutely! Just roll it slightly thicker than store-bought—about ½-inch—since homemade dough doesn’t have the same stretch. Bonus: You can add a pinch of garlic powder to the dough for extra flavor!
What’s the best cheese substitute? If cheddar’s not your thing, try Pepper Jack for a kick or Mexican blend for that restaurant-style melt. Heck, I’ve even used crumbled queso fresco when I wanted something different!
Can I prep these ahead? You bet—just cook the meat filling up to 2 days in advance. Store it chilled, then reheat with a splash of water before assembling. The biscuit dough? Always best fresh—that “pop” when you open the can is half the fun anyway!
Print25-Minute Cheesy Taco Biscuit Cups That Wow Every Time

Cheesy Taco Biscuit Cups are a fun and easy Tex-Mex appetizer or weeknight dinner. These mini taco muffin bites combine ground beef, taco seasoning, and biscuit dough for a crispy, cheesy snack bake.
- Prep Time: 10 minutes
- Cook Time: 15 minutes
- Total Time: 25 minutes
- Yield: 8 cups 1x
- Category: Appetizer
- Method: Baking
- Cuisine: Tex-Mex
- Diet: Low Lactose
Ingredients
- 1 lb ground beef
- 1 packet taco seasoning
- ⅓ cup water
- 1 can refrigerated biscuit dough (8-count)
- 1 cup shredded cheddar cheese
- ½ cup shredded lettuce
- ½ cup diced tomatoes
- ½ cup sour cream (for topping)
- Olive oil or non-stick spray for muffin tin
Instructions
- Brown the ground beef in a skillet over medium heat. Add taco seasoning and water, then simmer until thickened.
- Flatten each biscuit and press into the cups of a greased muffin tin.
- Spoon the taco meat into each biscuit cup and top with shredded cheddar cheese.
- Bake at 375°F (190°C) for 12–15 minutes until golden brown and bubbly.
- Let cool for a few minutes, then top with lettuce, diced tomatoes, and sour cream.
Notes
- Use lean ground beef for a healthier option.
- Customize toppings with jalapeños, avocado, or salsa.
- Store leftovers in an airtight container for up to 2 days.
Nutrition
- Serving Size: 1 cup
- Calories: 300
- Sugar: 2g
- Sodium: 450mg
- Fat: 18g
- Saturated Fat: 7g
- Unsaturated Fat: 8g
- Trans Fat: 0g
- Carbohydrates: 22g
- Fiber: 1g
- Protein: 17g
- Cholesterol: 50mg