
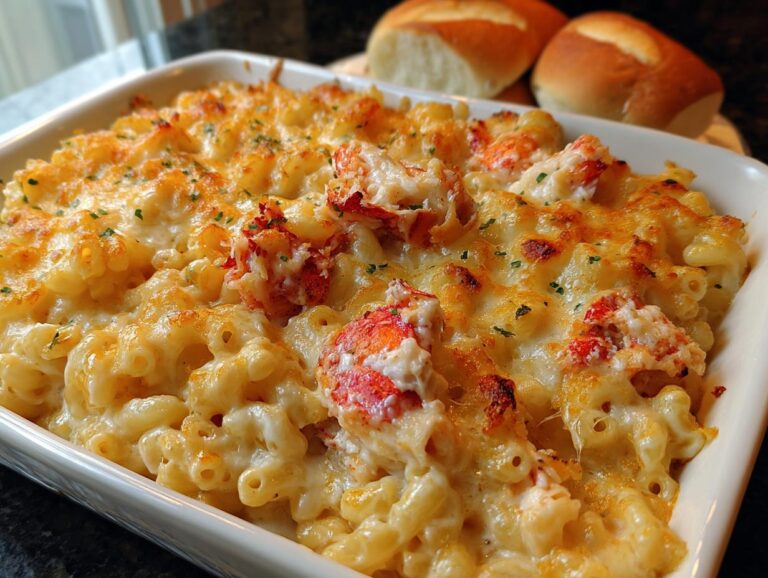
Oh, lobster mac and cheese—just saying it makes my mouth water! This dish is my ultimate comfort food, the kind of meal that turns an ordinary Tuesday into something special. I still remember the first time I had it at a little seaside restaurant years ago. That first bite of creamy, cheesy pasta with tender chunks of sweet lobster? Absolute heaven. Now, I make my own version at home whenever I need a little indulgence or want to impress guests. It’s surprisingly easy to whip up, but it feels so luxurious—the perfect balance of cozy and fancy. Trust me, once you try this recipe, you’ll understand why lobster mac and cheese deserves a permanent spot in your comfort food rotation!
Why You’ll Love This Lobster Mac and Cheese
Let me tell you why this lobster mac and cheese is about to become your new obsession—it’s not just good, it’s “lick-the-bowl-clean” good! Here’s what makes it so special:
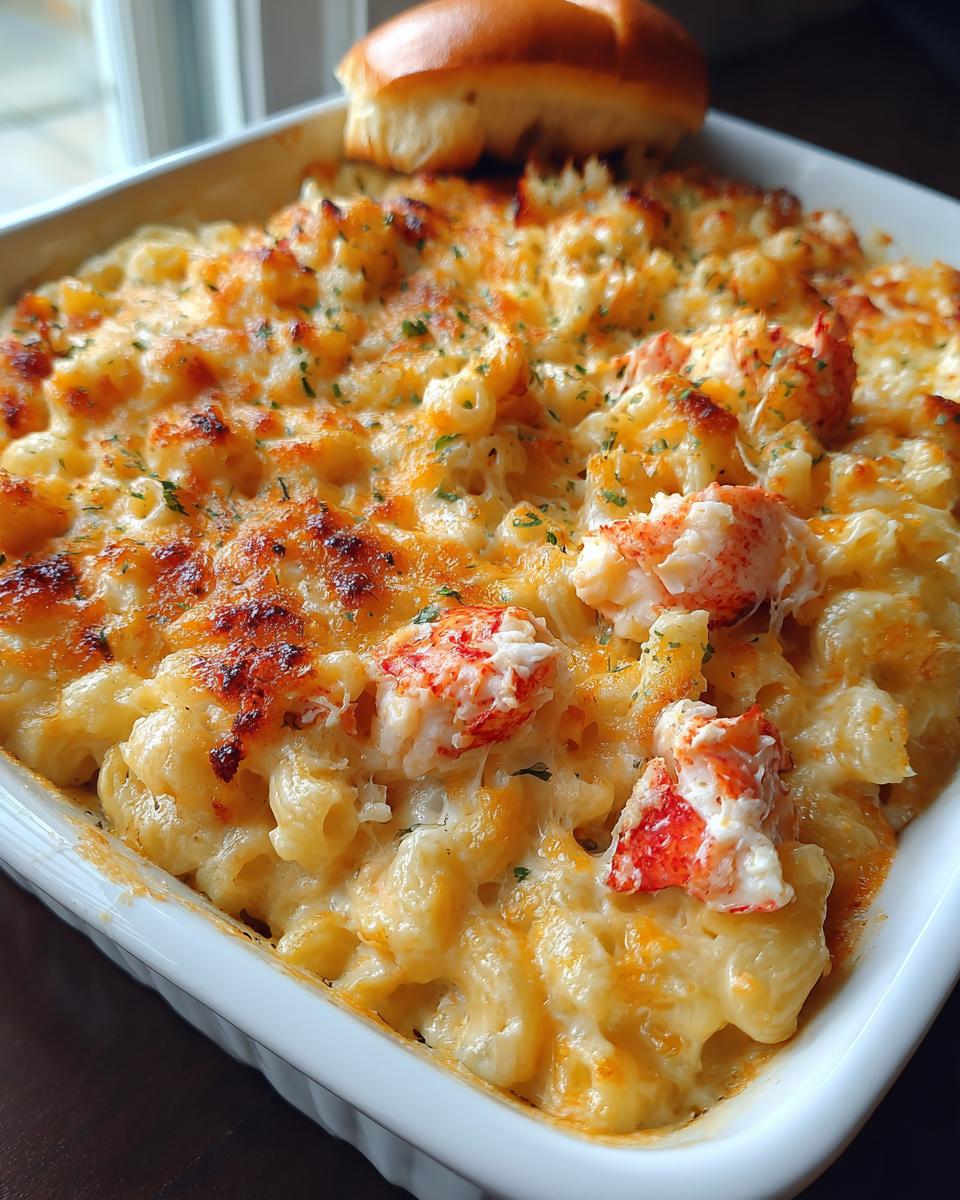
- Creamy dreamy texture: That cheese sauce? It’s velvety smooth, thanks to the perfect blend of sharp cheddar, mozzarella, and a touch of Gruyère (my little secret for extra richness).
- Lobster in every bite: No skimping here—generous chunks of sweet, tender lobster meat make this feel like a splurge-worthy restaurant dish.
- Golden, crispy top: The buttery panko topping gives that irresistible crunch contrast to the creamy pasta underneath.
- Fancy but easy: It looks impressive enough for date nights or holidays, but comes together as easily as regular mac and cheese (just with way more “oohs” and “aahs”).
- Comfort food upgrade: All the cozy vibes of classic mac, but with that luxurious lobster twist that makes ordinary days feel celebratory.
Ingredients for Lobster Mac and Cheese
Here’s everything you’ll need to make this heavenly dish—trust me, every ingredient plays a starring role in creating that perfect creamy, cheesy, lobster-packed bite:
- 1 lb elbow macaroni or cavatappi (those little twists hold the sauce so well!)
- 2 cups cooked lobster meat, chopped (claw and tail meat give the best texture)
- 4 tbsp unsalted butter (for that rich, velvety roux base)
- 1/4 cup all-purpose flour (the magic thickener)
- 3 cups whole milk, warmed (cold milk would make the sauce lumpy—learned that the hard way!)
- 1 cup heavy cream (because why not go all out?)
- 2 cups sharp cheddar, shredded (the sharper, the better for flavor)
- 1 cup mozzarella, shredded (for that perfect melt)
- 1/2 cup Gruyère, shredded (optional, but oh-so-worth-it for depth)
- Salt & pepper to taste (don’t be shy—cheese needs seasoning too)
- 1 tsp garlic powder (my little flavor booster)
- 1/2 tsp paprika (for color and a whisper of warmth)
- 2 tbsp fresh parsley, chopped (that pop of green makes it pretty)
- 1 tbsp olive oil or melted butter (for the panko topping)
- 1/2 cup panko breadcrumbs (optional, but that crunch is everything)
How to Make Lobster Mac and Cheese
Okay, let’s get cooking! This lobster mac and cheese comes together in four simple (but oh-so-important) steps. Follow along, and I promise you’ll end up with the creamiest, cheesiest, most luxurious mac of your life. Don’t forget to preheat your oven to 375°F first—trust me, you’ll need it piping hot for that perfect golden crust!
Step 1: Cook the Pasta
First things first—the pasta! Bring a big pot of salted water to a rolling boil (I use about 2 tablespoons of salt—it should taste like the sea). Toss in your elbow macaroni or cavatappi and cook just until al dente, about 1 minute less than the package says. Why? Because it’ll keep cooking in the oven later, and nobody wants mushy mac. Drain it well, then give it a quick toss with a tiny splash of olive oil to keep the noodles from sticking together while you work on that luscious cheese sauce.
Step 2: Prepare the Cheese Sauce
Now for the magic—that creamy, dreamy cheese sauce. Melt your butter in a large skillet or Dutch oven over medium heat. Once it’s bubbling, whisk in the flour to make a roux. Keep whisking for about a minute until it turns golden and smells nutty (this cooks out the raw flour taste). Here’s my pro tip: slowly pour in the warmed milk and cream while whisking constantly—this keeps lumps at bay. Keep whisking until the sauce thickens enough to coat the back of a spoon, about 5 minutes. Now, turn the heat down low and stir in your cheeses until they melt into silky perfection. Season with garlic powder, paprika, salt, and pepper. Taste it—is it heavenly? Good. You’re on the right track.
Step 3: Combine Lobster and Pasta
Time to bring it all together! Gently fold your cooked pasta into that glorious cheese sauce. Now, here’s where you need a light touch—add those beautiful lobster chunks and fold them in carefully. You want to keep those tender pieces intact, not break them into shreds. The goal? Every single forkful should have creamy pasta and sweet lobster in perfect harmony.
Step 4: Bake to Perfection
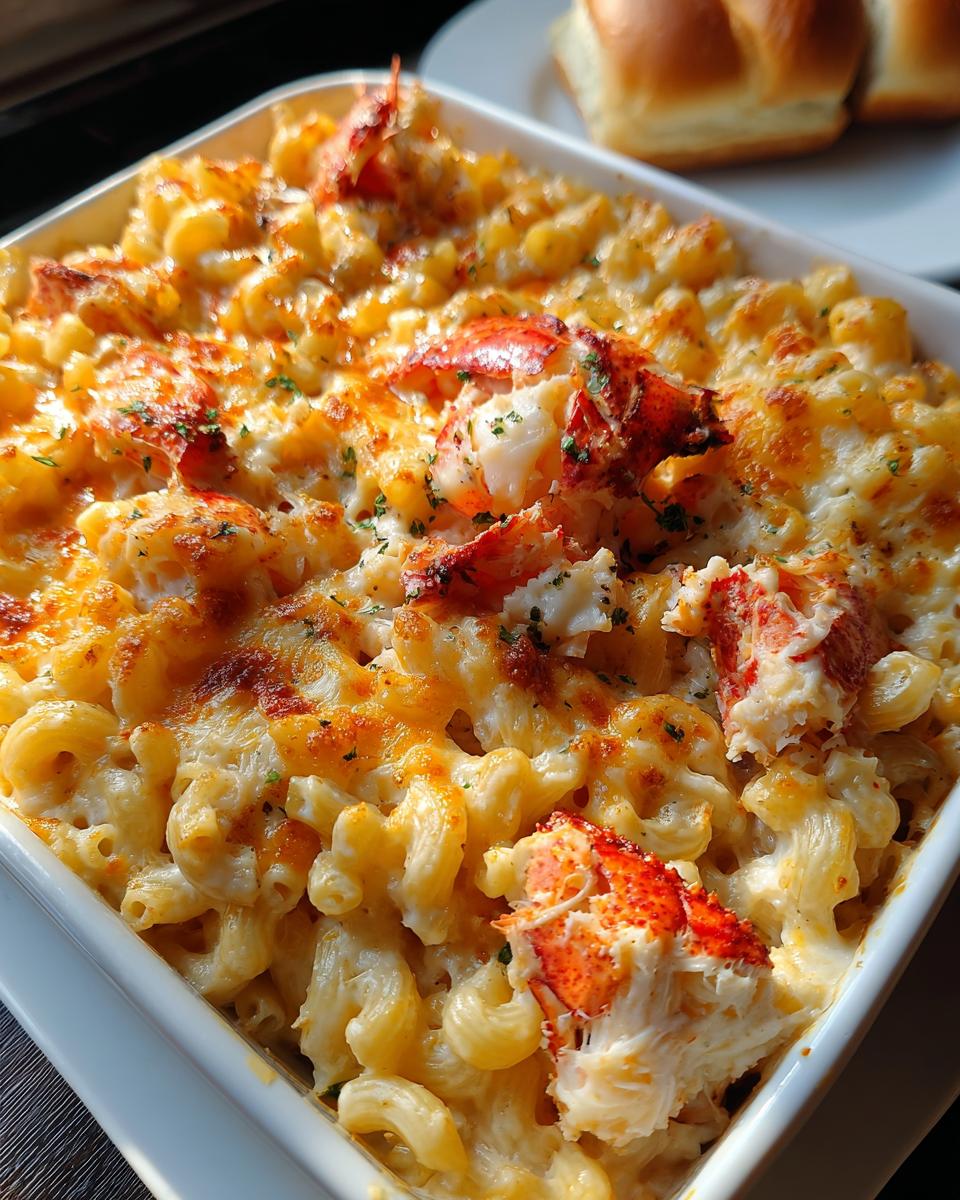
Pour your mac and cheese into a greased baking dish—I use a 9×13-inch, but anything similar works. For that irresistible crispy top, mix your panko breadcrumbs with melted butter or olive oil and sprinkle it all over the surface. Pop it into your preheated oven and bake for 20-25 minutes, until the top is golden and the edges are bubbling like crazy. I like to broil it for the last minute or two for extra crunch (but watch it like a hawk—it can burn fast!). Let it rest for 5 minutes after baking—this helps the sauce set just enough so it’s creamy, not runny. Finish with a sprinkle of fresh parsley, and oh my goodness…you’ve just made magic.
Tips for the Best Lobster Mac and Cheese
After making this dish more times than I can count, I’ve picked up some tricks that take lobster mac and cheese from great to “can I have seconds?” amazing. Here are my can’t-live-without tips:
- Fresh lobster is best: I know it’s pricier, but the sweet, delicate flavor of fresh lobster meat makes all the difference. If you must use frozen, thaw it slowly in the fridge and pat it super dry—no one wants watery mac!
- Don’t overcook the lobster: If you’re cooking live lobster yourself, just steam it until the shell turns bright red (about 8-10 minutes for 1-1.5 lb). Overcooked lobster gets rubbery, and we want those chunks melt-in-your-mouth tender.
- Warm your dairy: Cold milk or cream can make your cheese sauce break or get clumpy. I microwave my milk for 30 seconds before adding it to the roux—smooth sauce every time!
- Shred your own cheese: Pre-shredded bags contain anti-caking agents that can make your sauce grainy. Take the extra few minutes to shred blocks of cheese—your sauce will be silkier for it.
- Watch the bake time: The difference between perfect and overbaked is just a few minutes. When the top is golden and the edges bubble like crazy, it’s done—even if the center still looks a bit jiggly. It’ll set as it rests.
Lobster Mac and Cheese Variations
Love the idea but want to mix it up? Here are my favorite ways to play with this recipe while keeping that decadent comfort food vibe:
- Crab mac and cheese: Swap lobster for lump crab meat—it’s just as luxurious but with a slightly sweeter flavor that pairs beautifully with the cheese.
- Smoky twist: Add a bit of crispy bacon or pancetta before baking for a salty, smoky kick that cuts through the richness.
- Spice it up: A pinch of cayenne or a dash of hot sauce gives the creamy sauce a nice little wake-up call.
- Cheese shuffle: Try swapping half the cheddar for gouda or fontina—both melt like a dream and add new depth.
- Truffle love: A drizzle of truffle oil at the end takes this from fancy to “whoa, restaurant-quality” in seconds.
Serving Suggestions for Lobster Mac and Cheese
Oh, you’re gonna want to serve this lobster mac and cheese with all the right sides—trust me, I’ve tested every combo! My absolute must-have? Warm, buttery Hawaiian rolls for soaking up that extra cheesy sauce. A crisp green salad with lemon vinaigrette cuts through the richness perfectly. For special occasions, I’ll add roasted asparagus or garlicky sautéed spinach. And if you really want to go all out, a chilled glass of crisp chardonnay makes this meal feel straight out of a seaside bistro. Just don’t forget extra napkins—this is the kind of dish that deserves messy, happy eating!
Storing and Reheating Lobster Mac and Cheese
Here’s the good news—this lobster mac and cheese keeps beautifully, so you can enjoy it again tomorrow (if there’s any left, that is!). Let it cool completely, then store it airtight in the fridge for up to 3 days. When reheating, I splash in a tablespoon of milk or cream before popping it in the oven at 350°F for 20 minutes—this keeps it creamy instead of drying out. For single servings, the microwave works too—just cover with a damp paper towel and heat in 30-second bursts, stirring between each one. Frozen? Thaw overnight in the fridge first, then reheat as above. Pro tip: That crispy topping won’t be quite as crisp after storage, but a quick broil at the end fixes that!
Lobster Mac and Cheese Nutrition
Now, let’s be real—this isn’t diet food, but oh boy, is it worth every bite! Based on my recipe (and your actual ingredients may vary slightly), one generous serving has about 610 calories with 32g of protein—thanks to all that glorious lobster and cheese. You’ll get 45g of carbs from the pasta (comfort food essentials!), 35g of fat (hello, cream and butter magic), and 800mg sodium. It’s rich, indulgent, and packed with calcium from all that cheese. Want it lighter? Use half-and-half instead of cream and go easy on the breadcrumb topping—but personally, I say life’s too short to skip the good stuff when it comes to lobster mac!
Frequently Asked Questions
Q1. Can I use frozen lobster meat instead of fresh?
Absolutely! I use frozen lobster when fresh isn’t available—just thaw it overnight in the fridge and pat it REALLY dry with paper towels. The trick? Gently warm the lobster in the microwave for 10 seconds before adding it to the pasta. This prevents that chilly surprise in your first bite.
Q2. How do I keep my cheese sauce from separating?
Oh honey, I’ve been there—nothing worse than a grainy sauce! The secret is keeping your heat low when melting the cheese and not letting the sauce boil. Also, shred your own cheese—those pre-shredded bags have anti-caking agents that can make your sauce weirdly lumpy. If it does separate, whisk in a splash of warm milk to bring it back together.
Q3. What’s the best pasta shape for lobster mac and cheese?
I swear by elbow macaroni or cavatappi—those little tubes and twists hold onto every drop of that creamy sauce. Stay away from long pastas like spaghetti (trust me, it’s awkward to eat!). If you’re feeling fancy, small shells or rotini work great too.
Q4. Can I make this ahead of time?
You bet! Assemble everything through step 3, cover tightly, and refrigerate for up to 24 hours. When you’re ready, let it sit at room temp for 30 minutes, add a splash of milk to loosen the sauce, then bake as directed—just add 5-10 extra minutes since it’s starting cold. The wait will be torture, but that first bite? Pure bliss.
Q5. Why does my mac and cheese turn out dry?
Oh no—dry mac is the saddest mac! Usually this happens from overbaking (those extra 5 minutes can really do damage) or not using enough sauce. My trick? Make extra sauce than you think you need—the pasta will drink it up. Also, cover with foil for the first 15 minutes of baking to lock in moisture, then uncover for the golden top.
Final Thoughts
There you have it—my all-time favorite lobster mac and cheese recipe that never fails to impress. I can’t wait for you to try it! When you do, snap a photo and tag me—I love seeing your cheesy masterpieces. Now go grab that lobster and get cooking…your taste buds will thank you!
PrintCreamy Lobster Mac and Cheese Recipe with 3 Cheeses

Creamy, dreamy, and packed with flavor — the ultimate comfort food win!
- Prep Time: 15 minutes
- Cook Time: 30 minutes
- Total Time: 45 minutes
- Yield: 6 servings 1x
- Category: Main Dish
- Method: Baking
- Cuisine: American
- Diet: Low Lactose
Ingredients
- 1 lb elbow macaroni or cavatappi pasta
- 2 cups cooked lobster meat (claw & tail, chopped)
- 4 tbsp unsalted butter
- 1/4 cup all-purpose flour
- 3 cups whole milk (warm)
- 1 cup heavy cream
- 2 cups sharp cheddar cheese (shredded)
- 1 cup mozzarella cheese (shredded)
- 1/2 cup Gruyère cheese (optional for extra richness)
- Salt & pepper to taste
- 1 tsp garlic powder
- 1/2 tsp paprika
- 2 tbsp fresh parsley (chopped)
- 1 tbsp olive oil or melted butter (for topping)
- 1/2 cup panko breadcrumbs (optional topping)
- Soft Hawaiian rolls (for serving)
Instructions
- Boil & Prep the Pasta: Cook pasta al dente in salted water. Drain and toss with a splash of oil to keep it from sticking.
- Make the Creamy Cheese Sauce: Melt butter in a large skillet, whisk in flour, and stir constantly to make a roux. Slowly whisk in warm milk and cream until smooth, then simmer until thick and velvety.
- Cheese It Up: Stir in cheddar, mozzarella, and Gruyère until melted and creamy. Season with garlic powder, paprika, salt, and pepper.
- Add Lobster & Pasta: Fold in the lobster chunks and cooked pasta. Mix gently so every bite is coated in the cheesy sauce.
- Bake It to Golden Glory: Pour into a greased baking dish. Top with extra cheese, panko crumbs, and a drizzle of melted butter. Bake at 375°F for 20–25 minutes until golden and bubbly. Sprinkle fresh parsley on top and serve with soft rolls.
Notes
- Use fresh lobster meat for best results.
- Gruyère cheese adds extra richness but can be skipped.
- Panko breadcrumbs add a crunchy topping.
Nutrition
- Serving Size: 1 serving
- Calories: 610
- Sugar: 5g
- Sodium: 800mg
- Fat: 35g
- Saturated Fat: 20g
- Unsaturated Fat: 10g
- Trans Fat: 0g
- Carbohydrates: 45g
- Fiber: 2g
- Protein: 32g
- Cholesterol: 150mg