
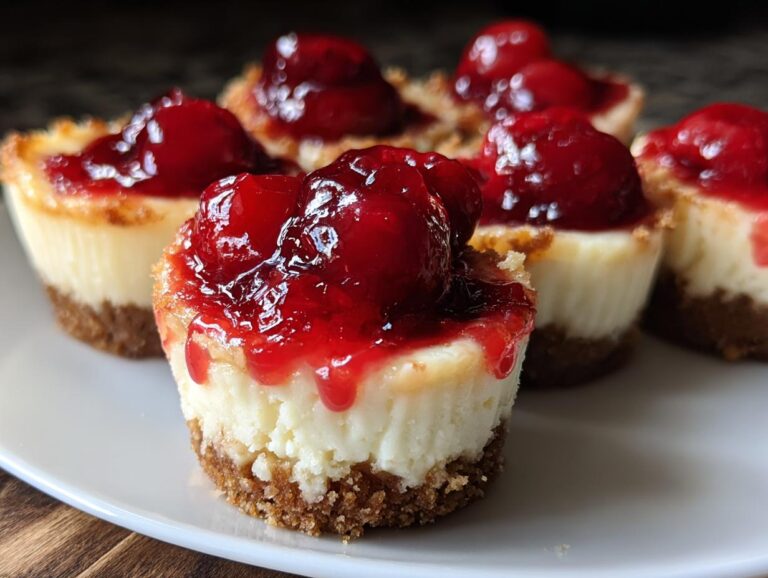
There’s something magical about bite-sized desserts, isn’t there? These cherry cheesecake bites are my go-to when I need something sweet, simple, and downright impressive. They’ve saved me at countless potlucks and family gatherings – trust me, nobody can resist popping one (or three) of these little beauties. The best part? They come together in about 30 minutes with ingredients you probably already have. Creamy cheesecake meets tart cherry topping on a buttery graham cracker crust – it’s like having mini cherry cheesecakes without all the fuss of a springform pan. My friends always ask for the recipe after they try them!
Ingredients for Cherry Cheesecake Bites
Okay, let’s gather our goodies! The beauty of this recipe is how simple the ingredient list is – no fancy stuff here. Just make sure your cream cheese is properly softened (leave it out for at least an hour) or you’ll be fighting lumps later. Here’s everything you’ll need:
- For the crust:
- 1 cup graham cracker crumbs (about 8 full sheets crushed)
- 3 tbsp granulated sugar
- 3 tbsp melted butter (salted works best here)
- For the filling:
- 16 oz (2 blocks) cream cheese, softened
- 1/2 cup granulated sugar
- 2 large eggs (room temperature if possible)
- 1 tsp vanilla extract (the real stuff, please!)
- 1 tbsp all-purpose flour
- For topping:
- 1 can (21 oz) cherry pie filling (look for one with plump cherries)
- Equipment:
- 12 cupcake liners (foil liners work best – they peel away cleanly)
- Standard muffin tin
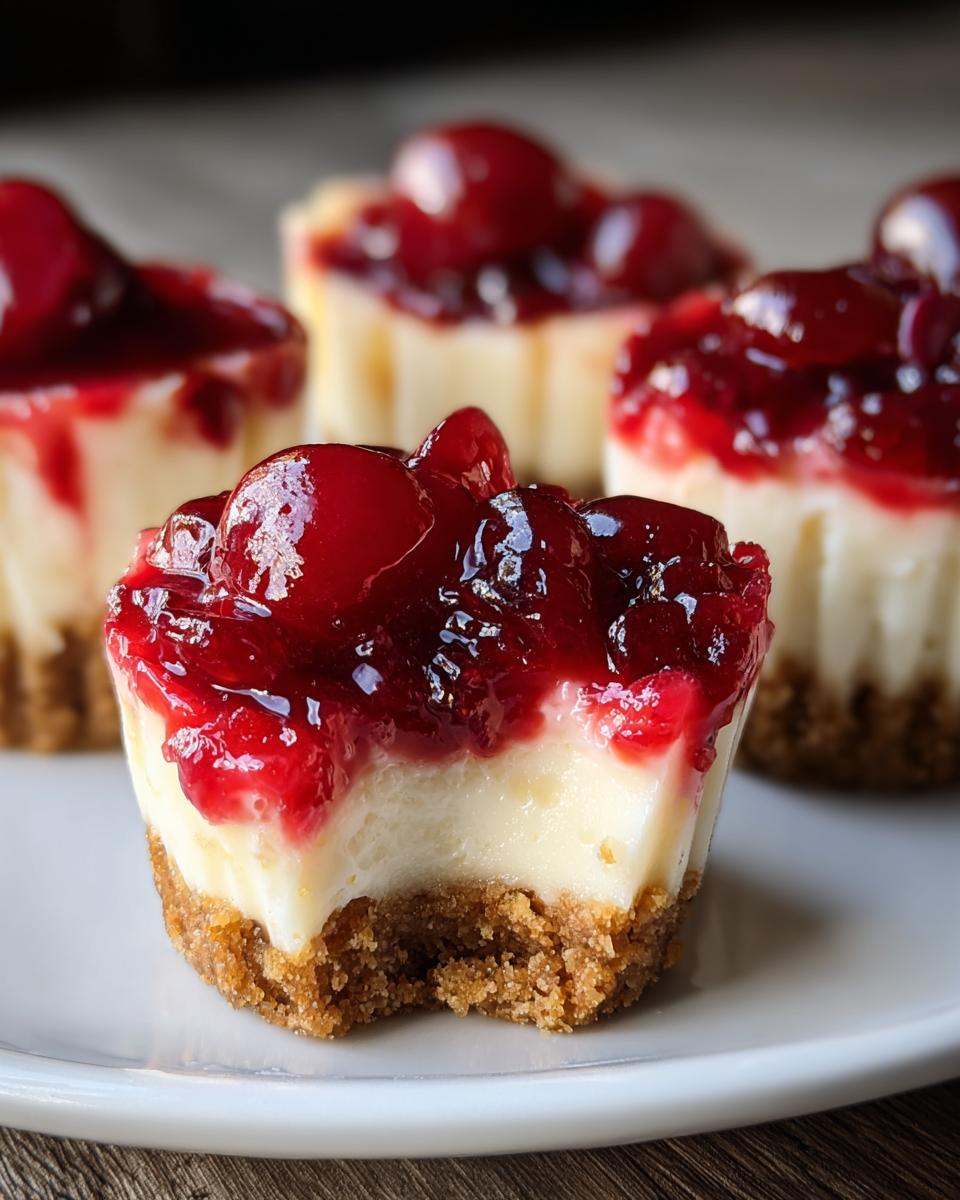
A quick tip from my many cheesecake adventures: measure your graham cracker crumbs after crushing them, not before. Those crumbs can be deceiving in volume! And don’t skimp on the vanilla – it makes all the difference in balancing that tangy cream cheese flavor.
How to Make Cherry Cheesecake Bites
Alright, let’s get baking! These little cheesecake bites come together so easily, but I’ve learned a few tricks over the years to make them absolutely perfect every time. Follow these steps, and you’ll have a tray of irresistible mini cherry cheesecakes before you know it.
Prepare the Graham Cracker Crust
First things first – let’s make that buttery, crunchy base. Mix your graham cracker crumbs, sugar, and melted butter in a bowl until it looks like wet sand. I like to use a fork to really work the butter in evenly. Now, here’s my secret: use a tablespoon measure to scoop the mixture into your cupcake liners (about 1 tbsp per liner). Press it down firmly with the back of the spoon or your fingers – you want it packed tight so it holds together when you bite into it later. Don’t be shy with this step – a solid crust makes all the difference!
Make the Cheesecake Filling
Now for the good stuff – that creamy, dreamy cheesecake filling. Beat your softened cream cheese until it’s completely smooth (no lumps allowed!). This might take a couple minutes, so be patient. Gradually add the sugar, then the eggs one at a time, mixing well after each addition. Here’s where I always scrape down the sides of the bowl – those sneaky cream cheese lumps love to hide there! Finally, mix in the vanilla and flour just until combined. You’ll know it’s ready when the batter looks like satiny clouds – thick but pourable.
Bake and Add Cherry Topping
Pour the filling over your crusts, filling each liner about 3/4 full. They’ll puff up a bit while baking, so leave some room. Pop them in a 325°F oven for 18-20 minutes – you want the centers to be just slightly jiggly when you gently shake the pan. They’ll firm up as they cool. And here’s the hardest part – you MUST let them cool completely before adding that gorgeous cherry topping! I know it’s tempting, but if you add the cherries while they’re warm, you’ll get a soggy mess. Once cooled, spoon on that ruby-red cherry pie filling – about 1-2 cherries per cheesecake bite should do it. Now try not to eat them all at once!
Why You’ll Love These Cherry Cheesecake Bites
Let me tell you why these little bites of joy have become my most requested recipe. Once you try them, you’ll understand the obsession!
- No water bath needed – Unlike traditional cheesecakes that require that fussy water bath setup, these cherry cheesecake bites bake up perfectly without any extra hassle. Just pop them in the oven and walk away!
- Perfect portion control – Okay, who am I kidding? You’ll probably eat three. But at least they’re pre-portioned so you can pretend to be responsible!
- Gorgeous presentation – That ruby-red cherry topping against the creamy white cheesecake? Absolute showstoppers that look way fancier than the minimal effort they require.
- Crowd-pleasers – I’ve never brought these to a party without someone asking for the recipe. They’re perfect for bridal showers, holiday gatherings, or just because it’s Tuesday.
- Beginner-friendly – If you’ve been intimidated by full-size cheesecakes, these mini versions are your gateway drug to cheesecake mastery. Almost foolproof!
- Customizable – While we’re obsessed with the classic cherry version, you can switch up the toppings to whatever fruit or sauce you love most (but trust me, that cherry sauce is magic).
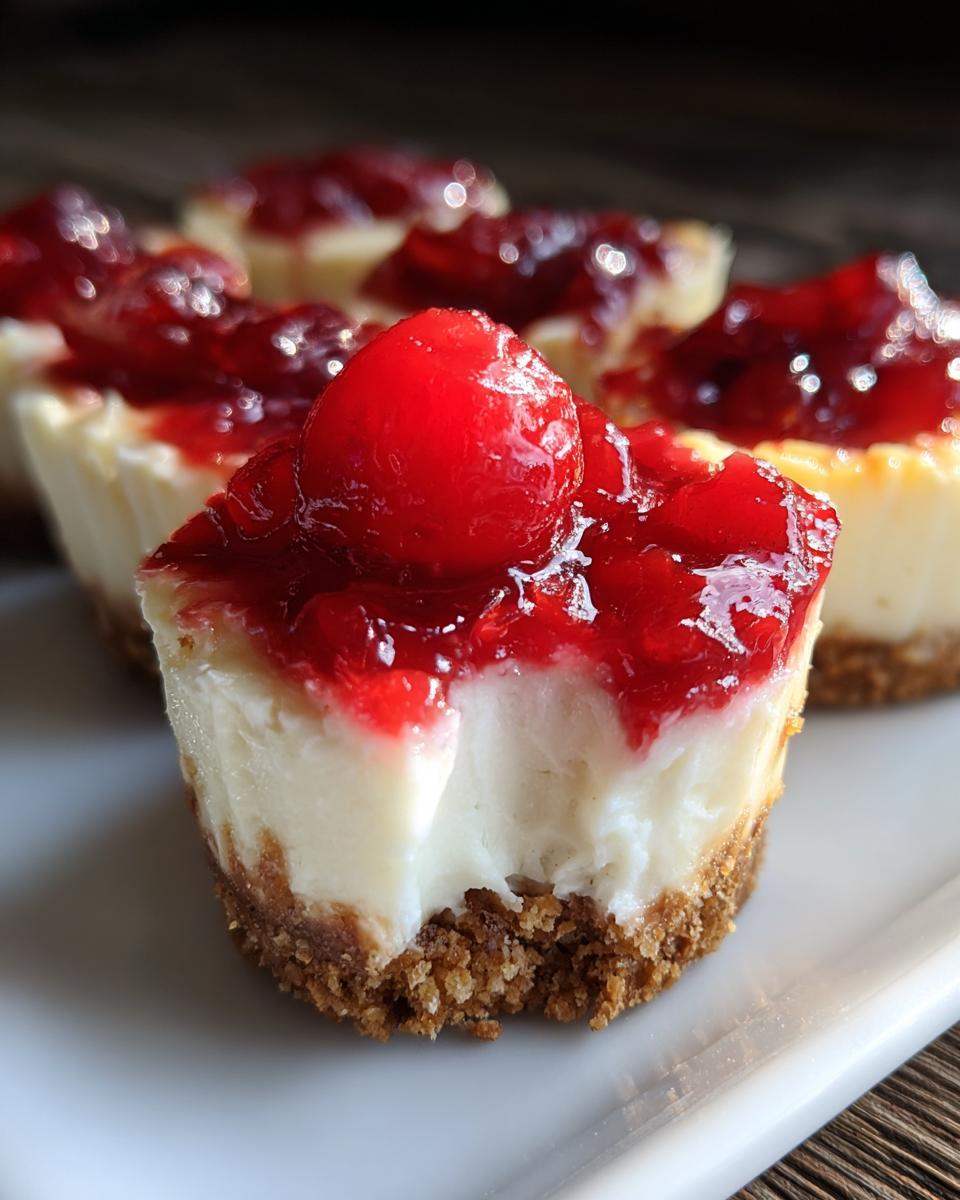
The best part? You get all the rich, creamy goodness of cherry cheesecake in perfectly poppable bites. Once you make these, you’ll understand why they disappear so fast at my house!
Tips for Perfect Cherry Cheesecake Bites
After making dozens (okay, maybe hundreds) of these little cheesecake bites, I’ve learned all the tricks to avoid common pitfalls. Here’s my hard-won wisdom for flawless mini cherry cheesecakes every single time!
Temperature is everything
I can’t stress this enough – your cream cheese must be properly softened. Leave it out on the counter for at least an hour before baking. Cold cream cheese equals lumpy batter, and nobody wants that! Your eggs should be room temperature too – just pop them in warm water for 5 minutes if you forgot to take them out earlier.
Mix with care
When making the filling, beat the cream cheese first until it’s completely smooth before adding anything else. But once the eggs are in, go easy on the mixing – overbeating incorporates too much air and can cause cracks. A few small lumps are better than an overworked batter. And always scrape that bowl – so many hidden lumps lurk at the bottom!
Crust pro tips
Press that graham cracker crust firmly into the liners – use a small glass or measuring cup if your fingers aren’t doing the trick. A loose crust will crumble when you bite into it. If you’re using regular paper liners, give them a quick spritz of baking spray to prevent sticking – those foil liners really are the best though.
Baking know-how
Don’t overbake! The centers should still have a slight jiggle when you take them out – they’ll firm up as they cool. And resist the urge to open the oven door during baking – sudden temperature changes can make cheesecakes crack. If they do develop small cracks? No worries, that cherry topping will cover it right up!
Patience pays off
I know it’s hard, but you must let these cool completely before adding the cherry topping. Warm cheesecake + cold pie filling = soggy crust disaster. For clean cuts, chill them in the fridge for an hour first if you’re making them ahead. And if you can wait overnight? The flavors develop even more – if they last that long!
Follow these tips, and you’ll be the cherry cheesecake bite hero at your next gathering. Just don’t be surprised when everyone begs you to make them again!
Cherry Cheesecake Bites Variations
Oh, the fun we can have with these little cheesecake bites! While I’m completely obsessed with the classic cherry version, sometimes it’s nice to mix things up. Here are my favorite twists that keep the recipe just as easy but add some delicious variety:
Fruit Topping Swaps
That cherry pie filling is divine, but don’t stop there! Any canned pie filling works beautifully:
- Blueberry pie filling – my second favorite after cherry
- Strawberry pie filling – especially pretty for Valentine’s Day
- Apple pie filling – perfect for fall gatherings
- Fresh fruit – try macerated strawberries or raspberry sauce
Crust Variations
The graham cracker crust is classic, but why not play with different bases?
- Oreo crumbs – for chocolate lovers (use 1.5 cups crumbs with 3 tbsp melted butter)
- Gingersnap crumbs – adds warm spice that pairs beautifully with cherry
- Shortbread cookie crumbs – extra buttery goodness
- Nilla wafer crumbs – gives a vanilla-forward base
Cheesecake Flavor Twists
Want to jazz up the filling itself? Try adding:
- 1 tbsp lemon zest – brightens up the flavor
- 1/4 cup mini chocolate chips – for chocolate cherry bliss
- 1 tsp almond extract – instead of vanilla for a marzipan vibe
- 2 tbsp peanut butter – swirl it in for PB&J vibes
The best part? All these variations keep the same simple method – just swap ingredients and enjoy delicious new flavors. My friends love when I bring a sampler platter with different versions!
Storing and Serving Cherry Cheesecake Bites
Now that you’ve made these irresistible little bites (and maybe taste-tested a few), let’s talk about keeping them fresh and serving them up in style. I’ve learned a few tricks over the years that’ll make your cherry cheesecake bites shine!
How to Store Your Cheesecake Bites
These babies need refrigeration – cream cheese and all that. Once cooled, pop them in an airtight container (I like using those plastic cupcake carriers) and they’ll keep beautifully for up to 3 days in the fridge. The cherry topping actually helps keep them moist! If you need to stack them, place parchment paper between layers to prevent sticking.
Want to get ahead? You can make the cheesecake portion a day in advance and add the cherry topping just before serving. The flavors actually improve after a night in the fridge – if you can resist eating them all immediately!
Serving Suggestions That Wow
While these cherry cheesecake bites are stunning on their own, here are some ways I love to serve them for extra pizzazz:
- Dust with powdered sugar right before serving for a snowy effect
- Add a dollop of whipped cream next to the cherry topping
- Drizzle with chocolate sauce for a decadent touch
- Arrange on a tiered dessert stand for parties – it’s instant elegance
- Serve with mini forks or decorative toothpicks for easy grabbing
For special occasions, I sometimes pipe a tiny rosette of whipped cream on each one before adding the cherry – takes them from cute to bakery-worthy! But honestly? They disappear just as fast when served straight from the muffin tin with napkins. No matter how you serve them, expect compliments!
One last tip: if you’re transporting these to a party, keep them chilled until serving time. That cherry topping can get a bit messy if it gets too warm. A cooler bag works perfectly for keeping them fresh on the go!
Cherry Cheesecake Bites Nutrition Info
Okay, let’s be real – we’re not eating cheesecake for its health benefits. But if you’re curious about what’s in these irresistible little bites, here’s the scoop! Remember, these numbers are estimates based on the exact ingredients I use, and your counts might vary slightly depending on brands and exact measurements.
Per cheesecake bite (1 of 12):
- Calories: ~220
- Total Fat: 12g
- Saturated Fat: 7g
- Sugar: 18g
- Carbohydrates: 25g
- Protein: 3g
- Sodium: 180mg
The biggest contributors? That cream cheese packs in the richness (and fat), while the cherry pie filling brings the sugar content up. The graham cracker crust adds just enough carbs to make it satisfying. I find one or two of these satisfy my sweet tooth completely – though I won’t judge if you go for three!
Want to lighten them up slightly? You could try reduced-fat cream cheese or a sugar-free pie filling, but honestly? I think these cherry cheesecake bites are worth every delicious calorie. Everything in moderation, right? Life’s too short not to enjoy the good stuff!
Cherry Cheesecake Bites FAQs
I get so many questions about these little cherry cheesecake bites whenever I make them! Here are the answers to the most common ones I hear – all the stuff I wish I’d known when I first started making them.
Can I freeze cherry cheesecake bites?
Absolutely! These mini cherry cheesecakes freeze beautifully. Just pop them in a single layer in an airtight container (I like using freezer bags with parchment between layers) and freeze for up to 2 months. Thaw overnight in the fridge – the texture stays perfect! Pro tip: Freeze them without the cherry topping and add it fresh after thawing for the best results.
Can I use fresh cherries instead of pie filling?
You sure can, but you’ll need to cook them down first. Fresh cherries need some sugar and cornstarch to thicken into a sauce – just simmer pitted cherries with 1/4 cup sugar and 1 tbsp cornstarch until syrupy. Let it cool completely before topping your cheesecake bites. The canned pie filling is just so convenient though!
Why did my cheesecake bites sink in the middle?
Oh no! This usually happens if you overmix the batter (too much air) or open the oven door too early. Don’t worry – they’ll still taste amazing! Next time, mix just until combined and resist peeking until at least the 15-minute mark. A slight dip is normal, but major sinking means they needed more baking time.
Can I make these without cupcake liners?
Technically yes, but I don’t recommend it. The liners make cleanup a breeze and help the cheesecake bites hold their shape. If you must go liner-free, grease your muffin tin really well and run a knife around each one after cooling for 10 minutes. Even then, you might lose some crust!
How far in advance can I make these for a party?
These are perfect make-ahead party desserts! The cheesecake portion can be made 2 days ahead (keep refrigerated), then add the cherry topping the day of your event. They actually taste better after chilling overnight as the flavors meld. Just don’t add the topping more than a few hours before serving to keep that crust crisp.
Got more questions? I’ve probably made every mistake possible with these cherry cheesecake bites over the years, so ask away in the comments! No question is too silly when it comes to cheesecake perfection.
Well, there you have it – everything you need to know to make the most irresistible cherry cheesecake bites this side of your favorite bakery! I still remember the first time I made these for a potluck – they disappeared so fast I barely got one myself. Now they’re my secret weapon for every gathering, from book club to birthday parties. The best part? Seeing everyone’s faces light up when they take that first creamy, cherry-topped bite. Trust me, once you make these, you’ll be hooked just like I am. Now go forth and bake up some happiness! And if you love this recipe as much as we do, be sure to rate it – it means the world to me when I hear how much you enjoyed them!
Print30-Minute Cherry Cheesecake Bites That Steal the Show

Mini cherry cheesecake bites perfect for parties or satisfying sweet cravings.
- Prep Time: 10 minutes
- Cook Time: 20 minutes
- Total Time: 30 minutes
- Yield: 12 cupcakes 1x
- Category: Dessert
- Method: Baking
- Cuisine: American
- Diet: Vegetarian
Ingredients
- 1 cup graham cracker crumbs
- 3 tbsp granulated sugar
- 3 tbsp melted butter
- 16 oz cream cheese, softened
- 1/2 cup granulated sugar
- 2 large eggs
- 1 tsp vanilla extract
- 1 tbsp all-purpose flour
- 1 can (21 oz) cherry pie filling
- Cupcake liners
Instructions
- Mix graham cracker crumbs, sugar, and melted butter. Spoon 1 tbsp into each cupcake liner and press down firmly.
- Beat softened cream cheese until smooth. Add sugar, eggs, vanilla, and flour. Mix until velvety and lump-free.
- Pour the cheesecake batter over the crusts, filling each liner 3/4 full.
- Bake at 325°F (163°C) for 18–20 minutes, or until the centers are almost set. Let cool completely.
- Add a spoonful of cherry pie filling on top of each cheesecake bite.
Notes
- Let the cheesecakes cool completely before adding the cherry topping.
- Store leftovers in the refrigerator for up to 3 days.
Nutrition
- Serving Size: 1 cupcake
- Calories: 220
- Sugar: 18g
- Sodium: 180mg
- Fat: 12g
- Saturated Fat: 7g
- Unsaturated Fat: 4g
- Trans Fat: 0g
- Carbohydrates: 25g
- Fiber: 0.5g
- Protein: 3g
- Cholesterol: 65mg